
 Scrapoxy
Digital Ocean Connector

Digital Ocean is an US multinational cloud provider.
Prerequisites
An active Digital Ocean subscription is required.
Digital Ocean Admin
Connect to Admin.
Create new credential
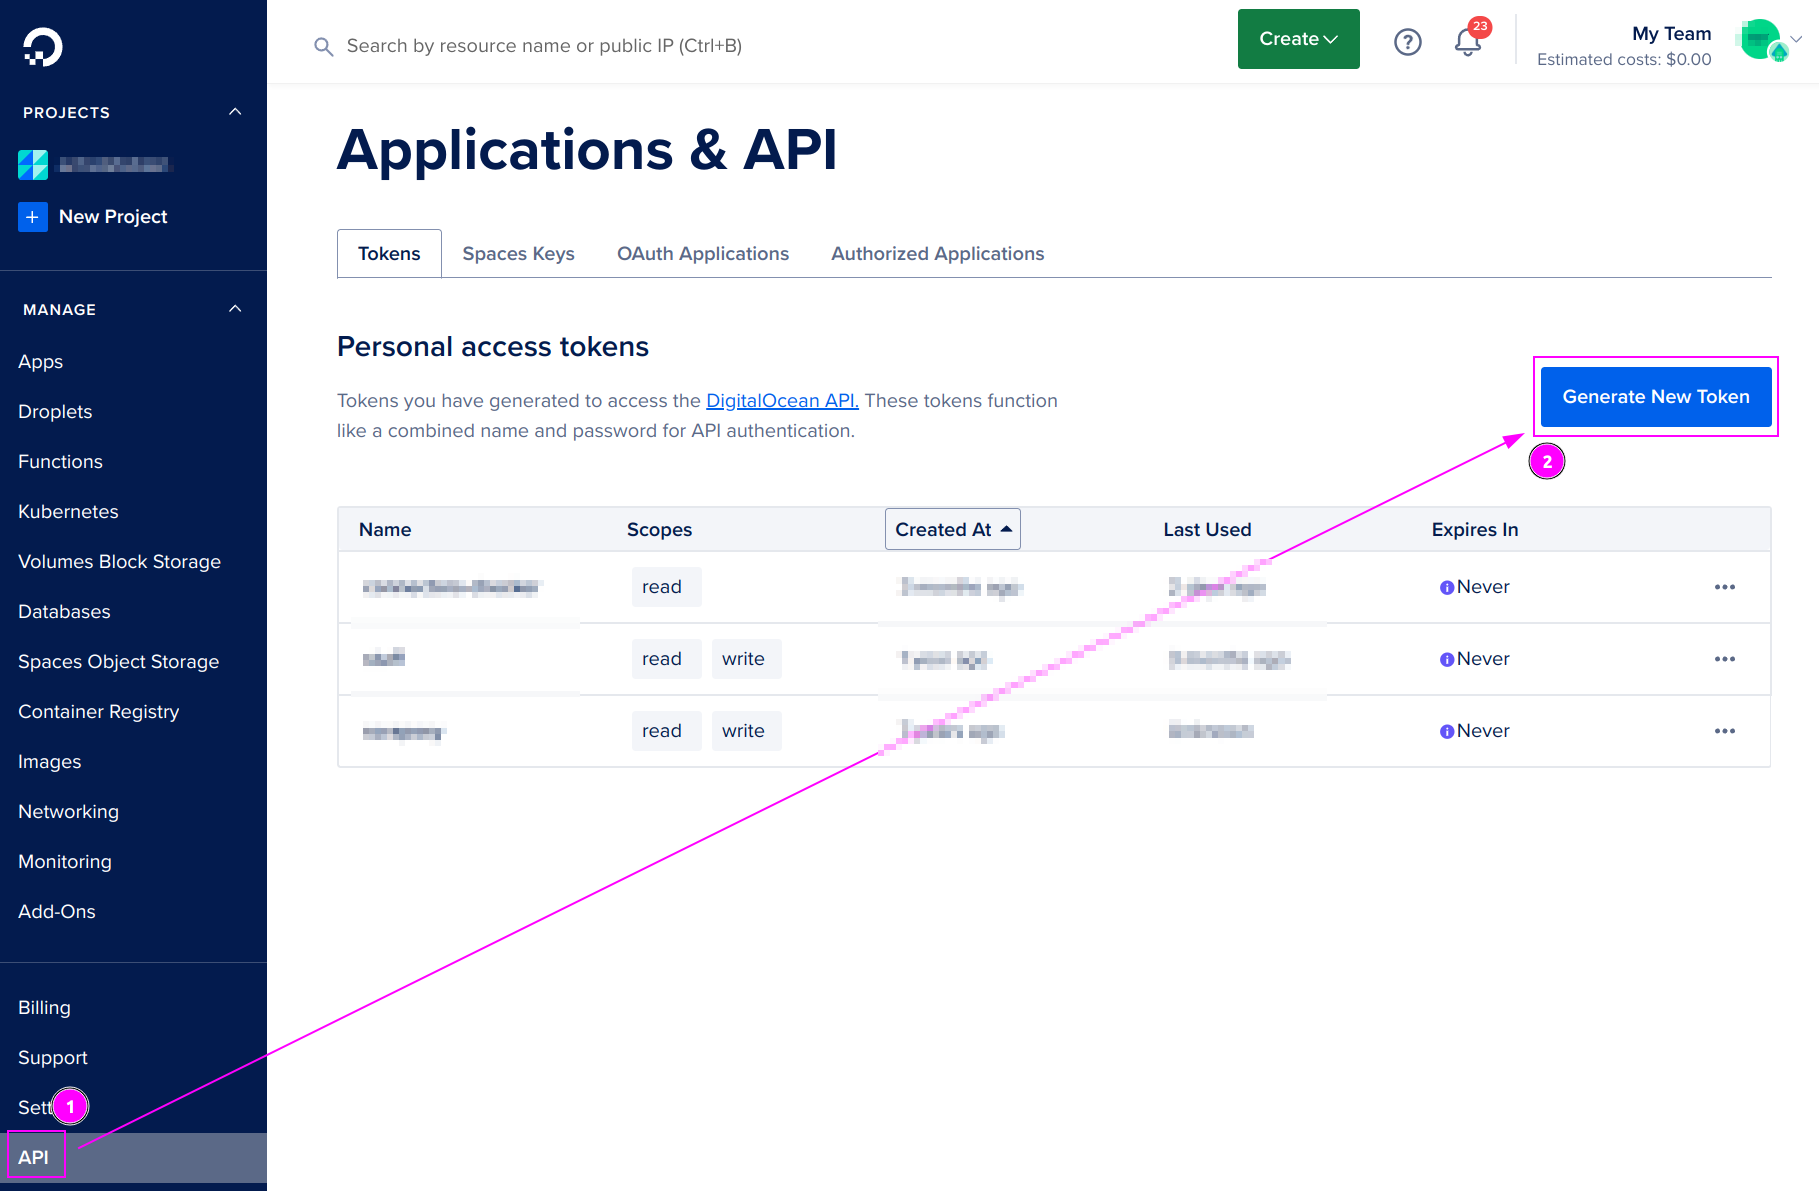
On the left menu, click on API and click on Generate New Token.
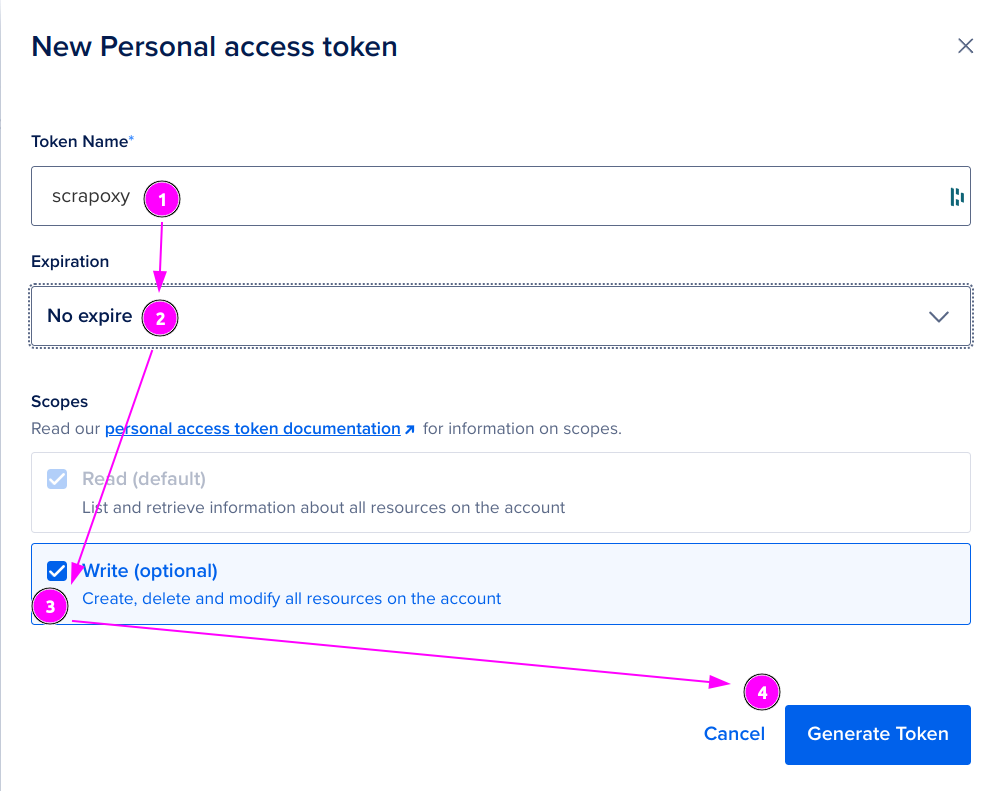
- Enter
scrapoxyas Token name; - Select
No expirefor Expiration; - Check the
Writebox on Scopes - And click on
Generate Token.
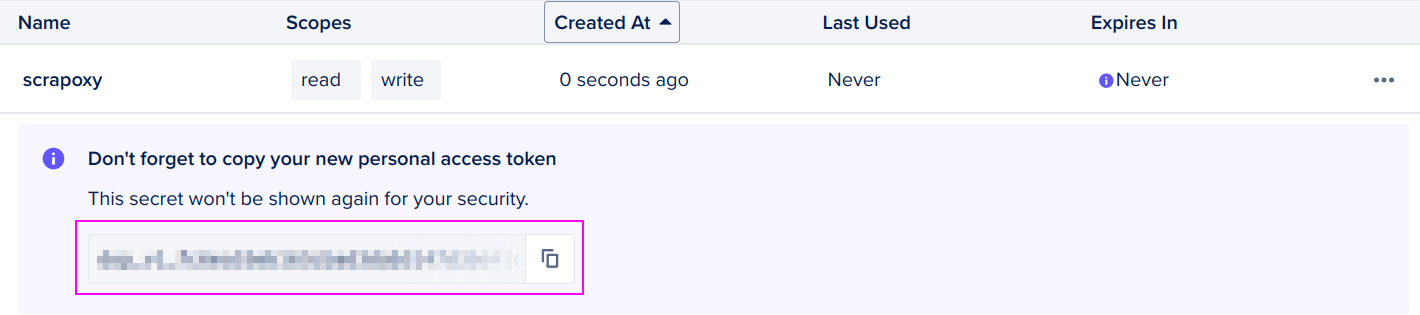
Remember the Token value.
Scrapoxy
Open Scrapoxy User Interface and select Marketplace:
Step 1: Create a new credential
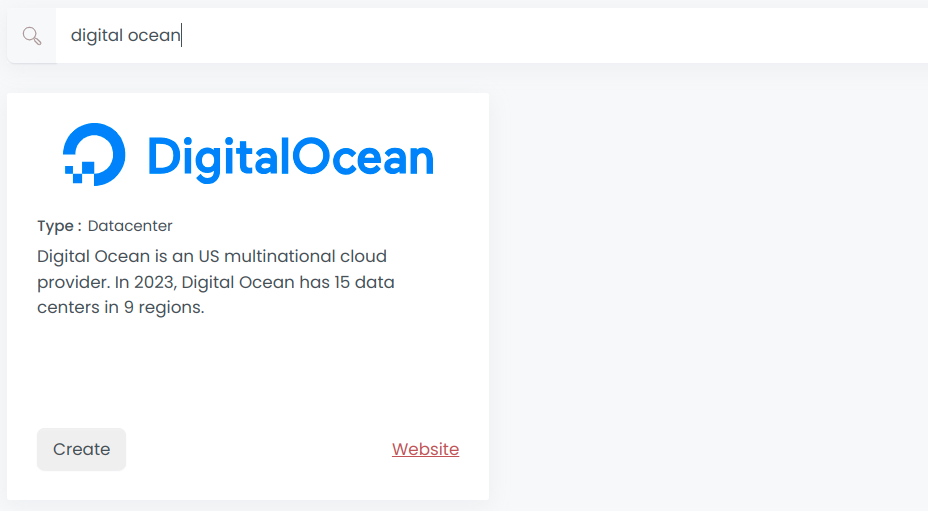
Select Digital Ocean to create a new credential (use search if necessary).
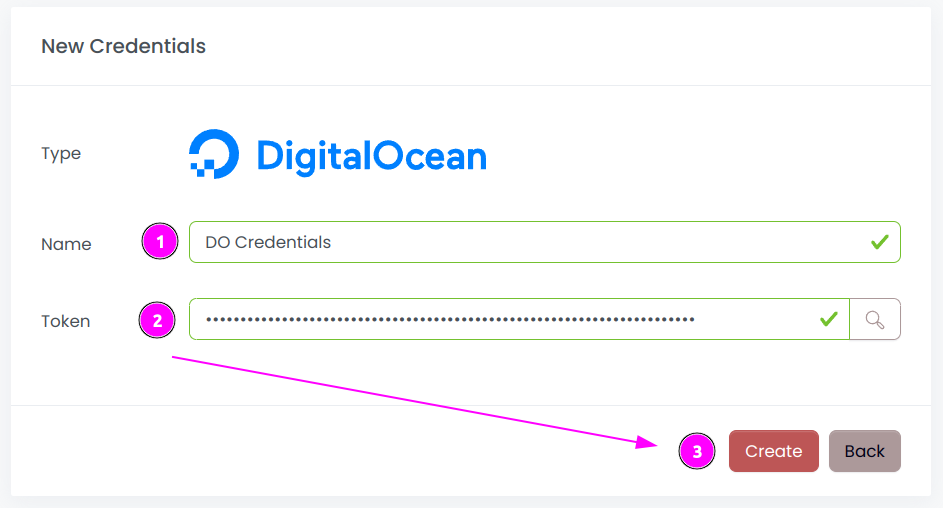
Complete the form with the following information:
- Name: The name of the credential;
- Access key ID: The Access key ID of the account;
- Secret access key: The Client Secret of the account.
And click on Create.
Step 2: Create a new connector
Create a new connector and select Digital Ocean as provider:
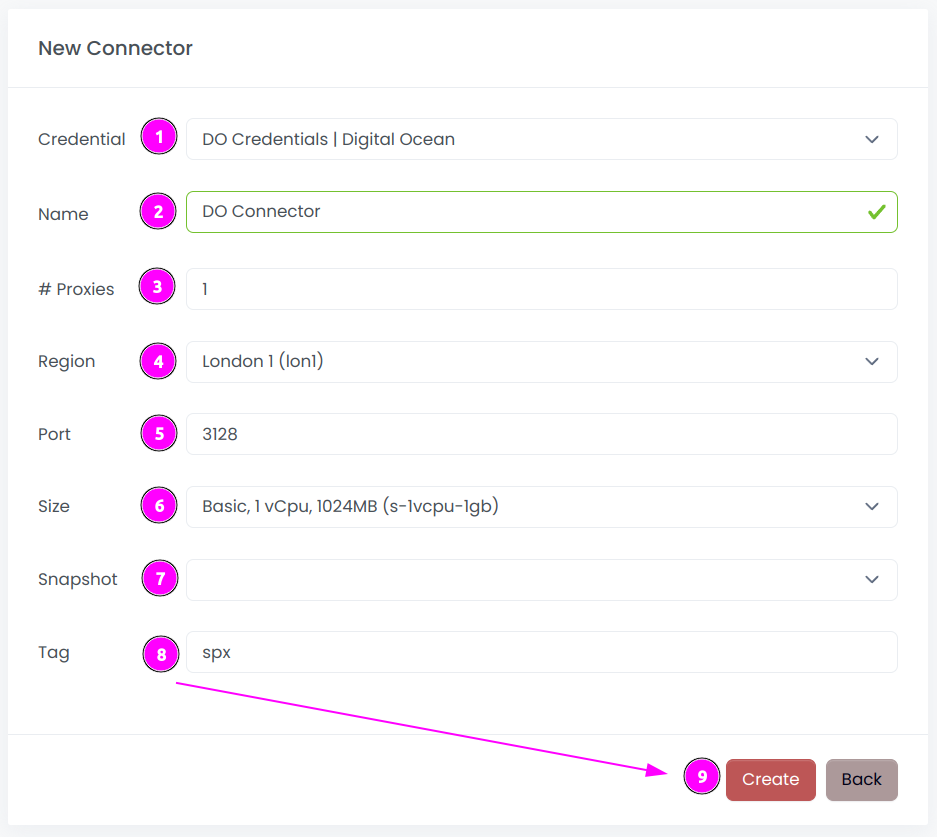
Complete the form with the following information:
- Credential: The previous credential;
- Name: The name of the connector;
- # Proxies: The number of instances to create;
- Region: The region where the instances will be created;
- Port: The port of the proxy (on Digital Ocean);
- Size: The type of the instance;
- Snapshot: The name of the snapshot to use. ⚠️ Don't fill it, it will be created automatically during installation;
- Security group name: The name of the security group containing the firewall rules;
- Tag: The default tag for instance.
And click on Create.
TIP
You can retain most of the default values if they are suitable for your use case.
Step 3: Install the connector
WARNING
Do not reuse an installation from a prior setup: Scrapoxy embeds a unique TLS certificate within the instance image to secure communication and communication with the Master will fail.
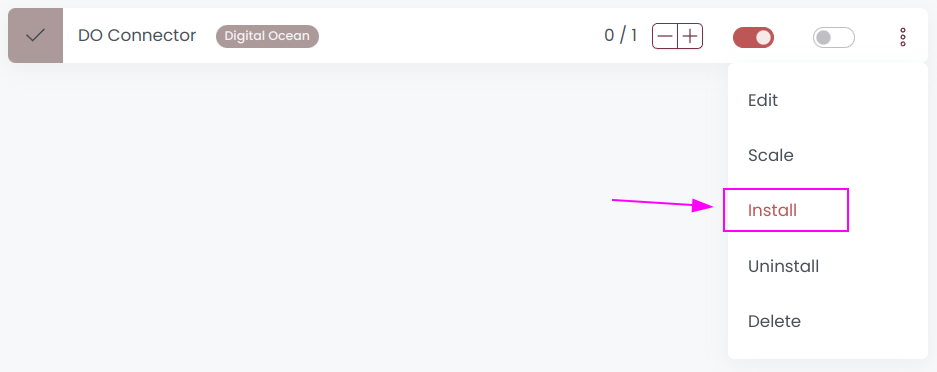
On the connector list, click on Install.
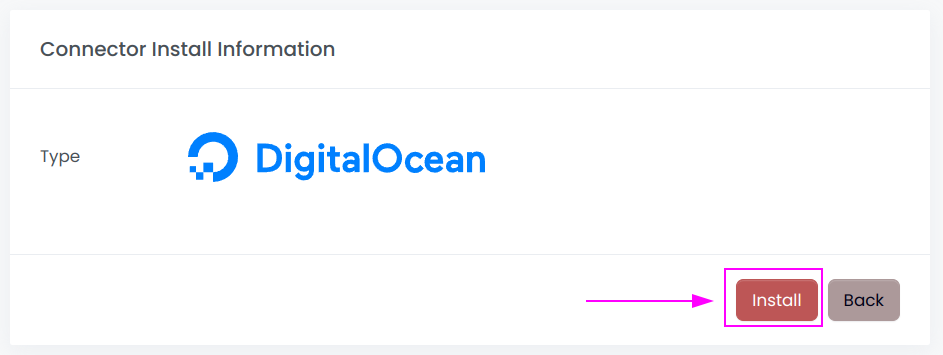
Click on Install.
Scrapoxy will start, install and stop the VM to create a custom image.
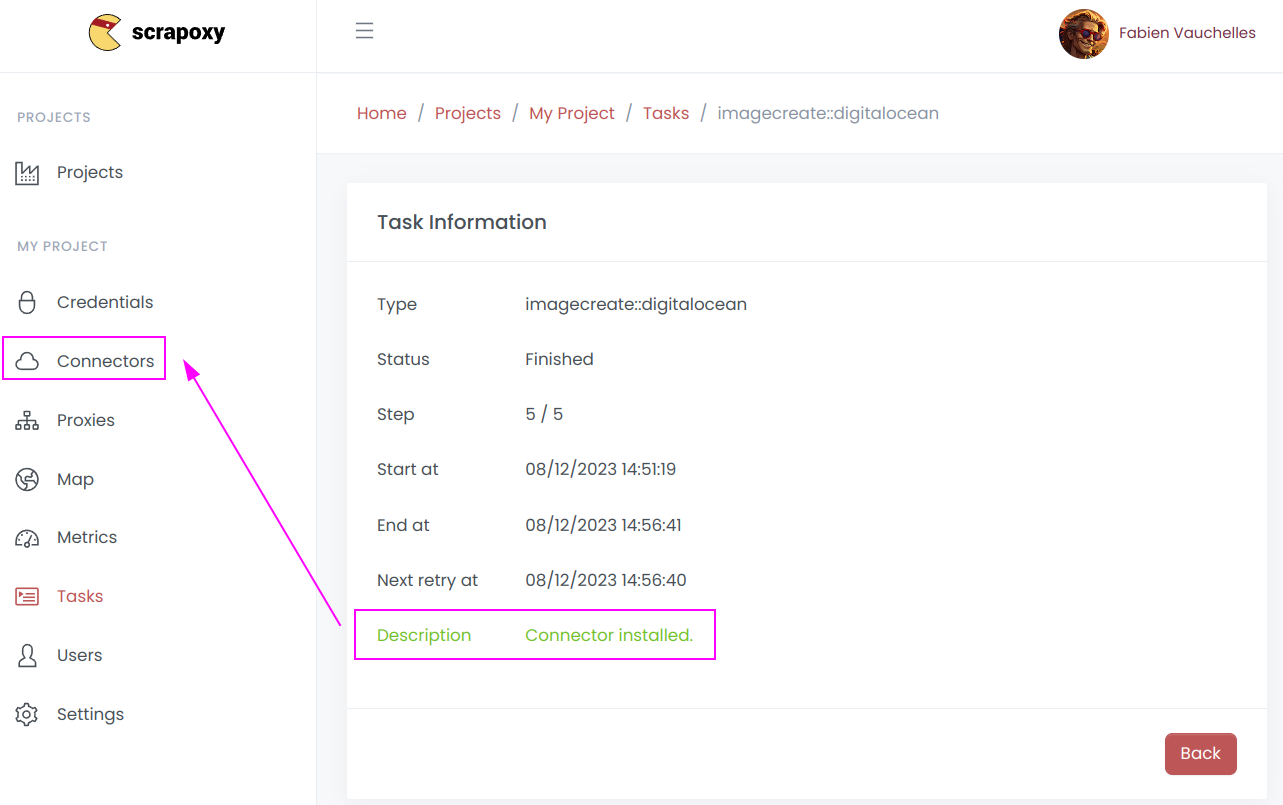
When the installation is finished, click on Connectors.
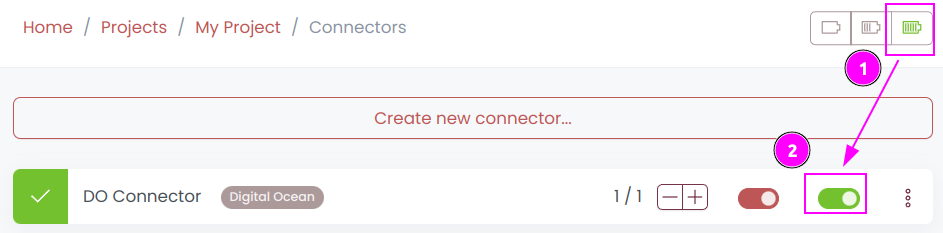
- Start the project;
- Start the connector.
TIP
Installation creates a custom image for this region. If you have multiple regions across multiple connectors, you must perform the installation step for each region.
Other: Uninstall the connector

- Stop the connector;
- Wait for proxies to be removed.

On the connector list, click on Uninstall.
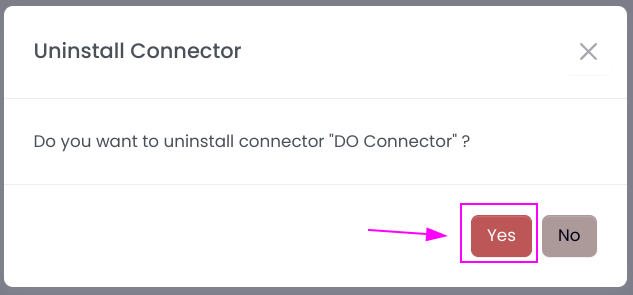
Confirm the uninstallation.
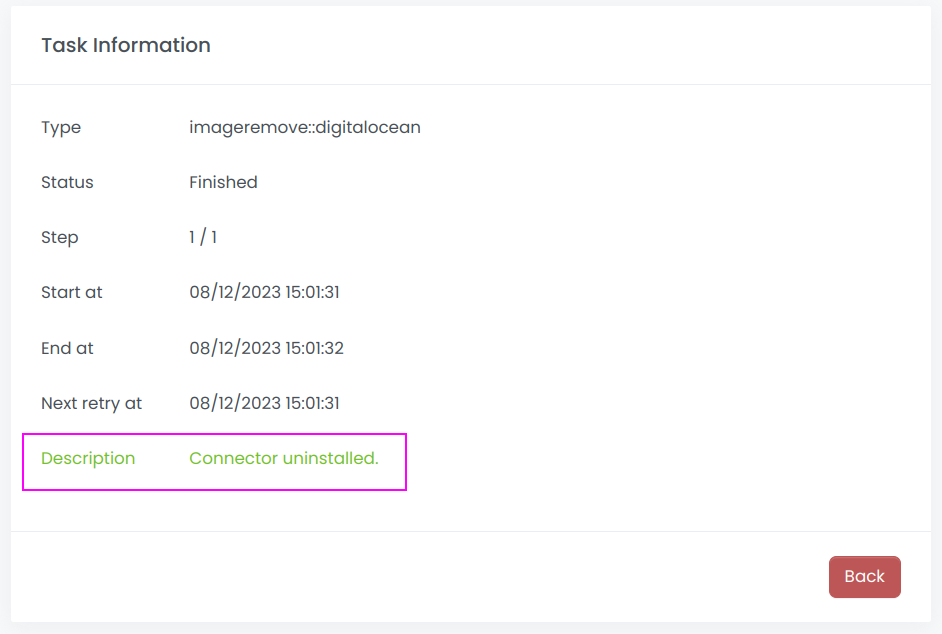
Wait for the uninstallation to finish: Scrapoxy will delete the custom image.