
 Scrapoxy
Google Cloud Platform Connector

Google Cloud Platform is a cloud computing services that runs on the same infrastructure that Google uses internally.
Prerequisites
An active GCP subscription is required.
GCP Console
Connect to Console.
Step 1: Create new project
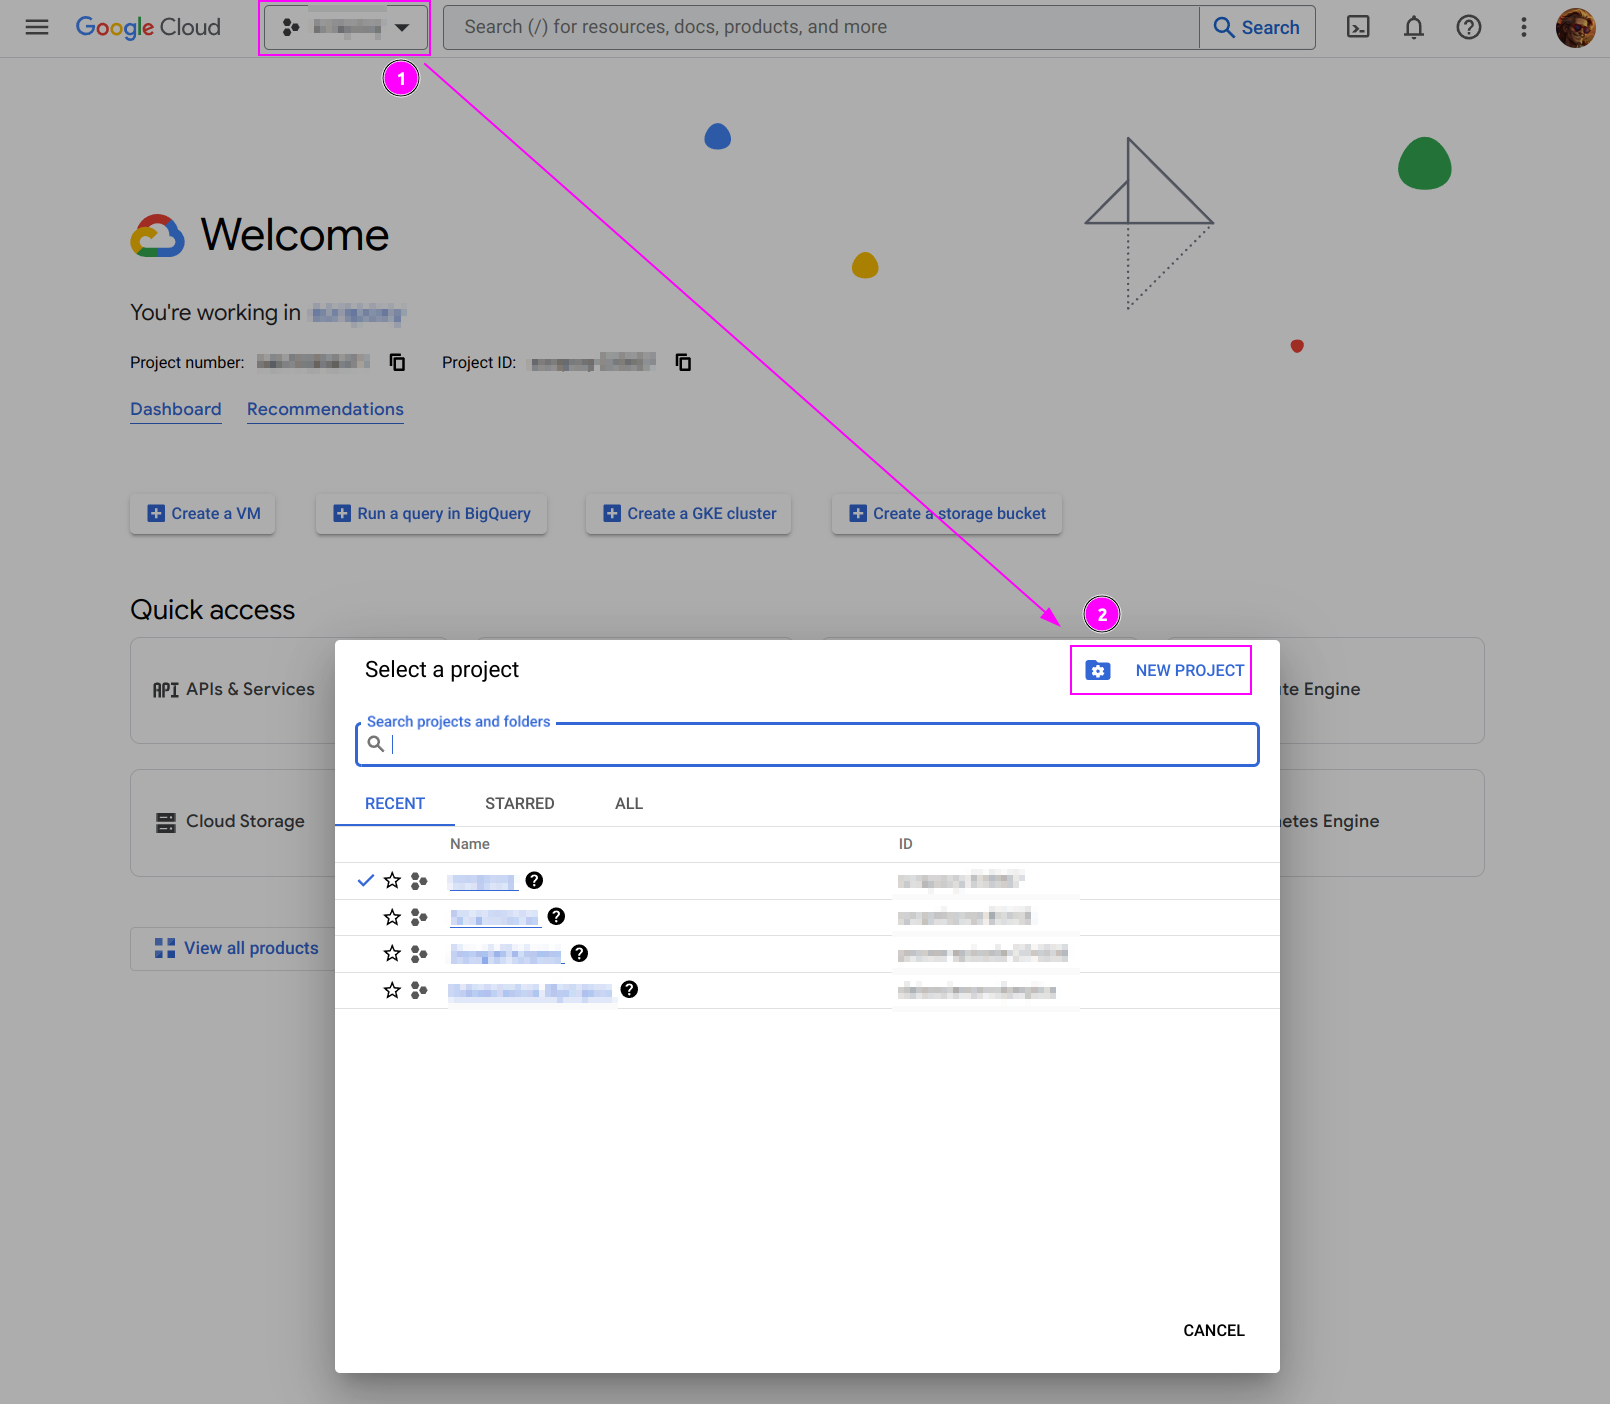
- On the top left, click on the current project,
- And click on
NEW PROJECT.
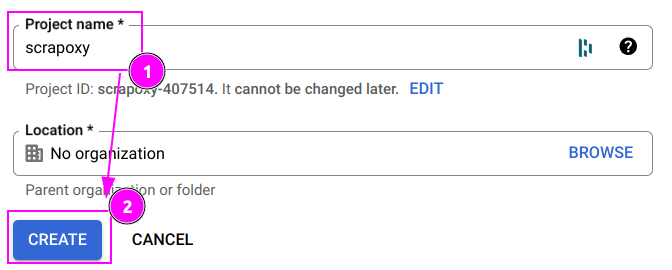
- Enter
scrapoxyas Project name; - And click on
CREATE.
Wait for the project to be created. A notification appears when it's done:
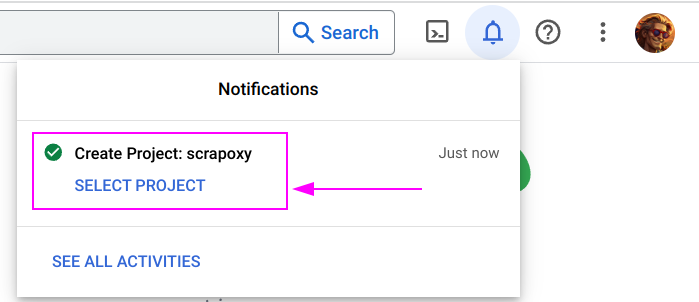
Click on SELECT PROJECT.
Step 2: Create new credential
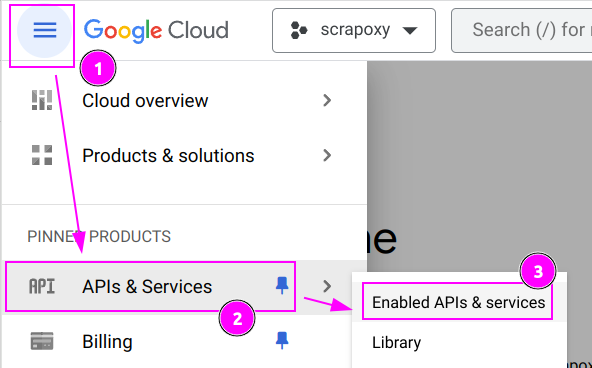
- On the top left, click on the hamburger menu;
- Click on
APIs & Services; - And click on
Enabled APIs & services.
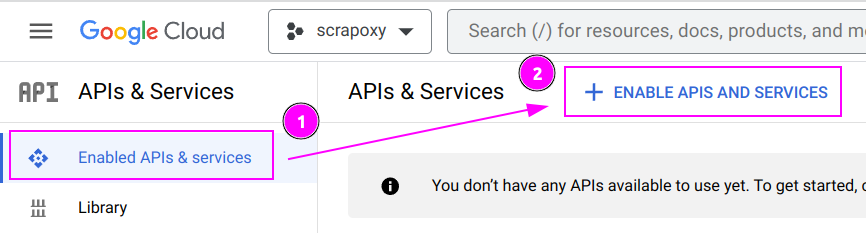
- On tab
Enabled APIs & services, - Click on
+ ENABLE APIS AND SERVICES.
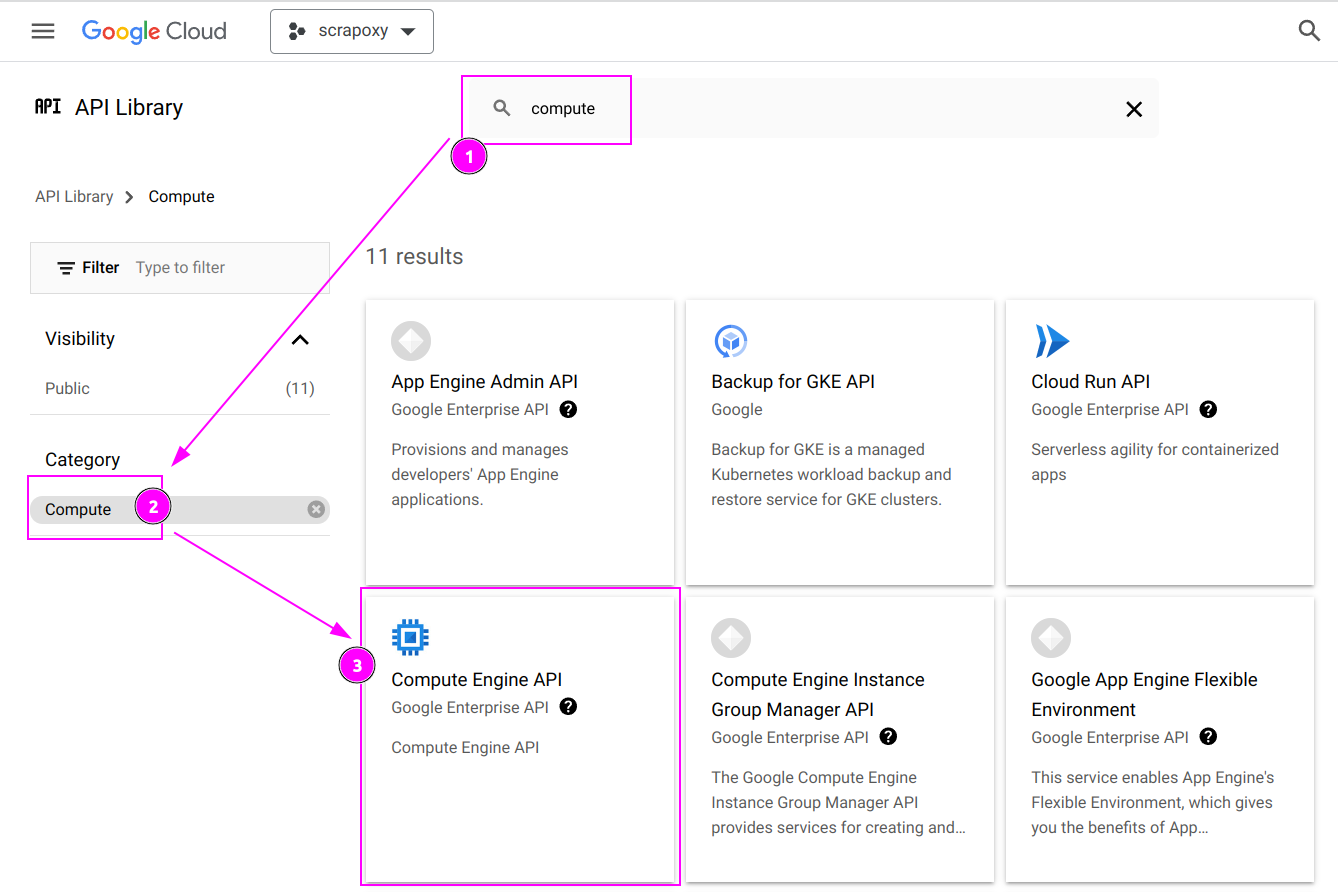
- Search
compute; - In the category
Compute, - Click on
Compute Engine API.
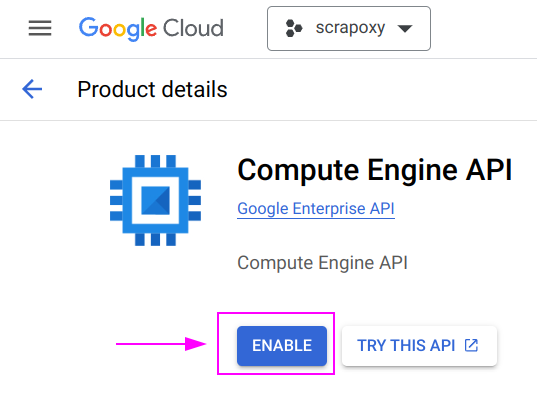
Click on ENABLE.
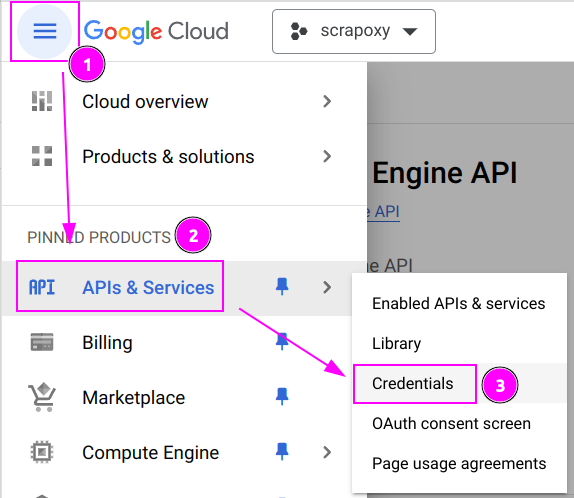
- On the top left, click on the hamburger menu;
- Click on
APIs & Services; - And click on
Credentials.

- Click on
Credentials - And click on the first service account
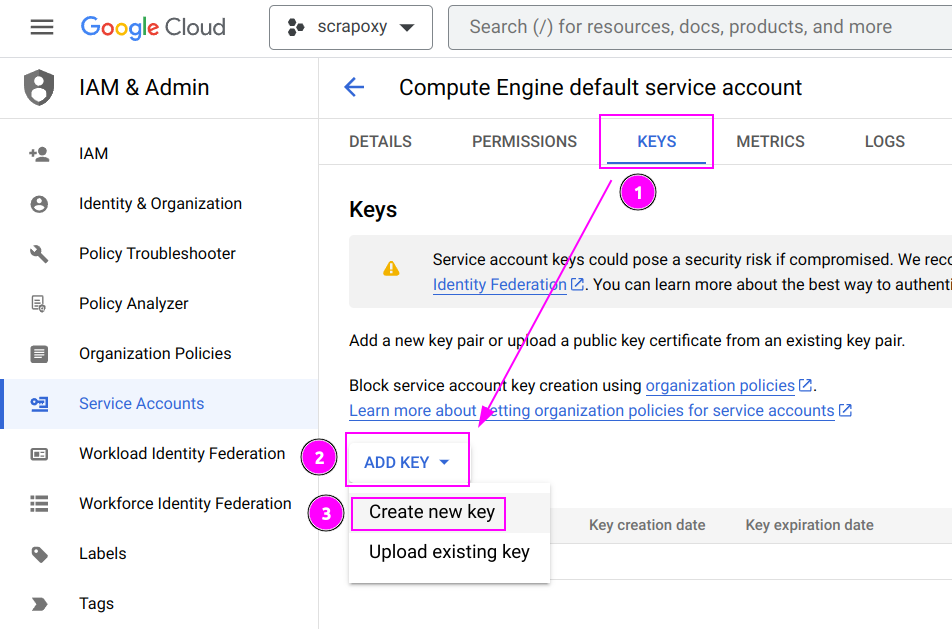
- Select
KEYStab; - Click on
ADD KEY; - And click on
Create new key.
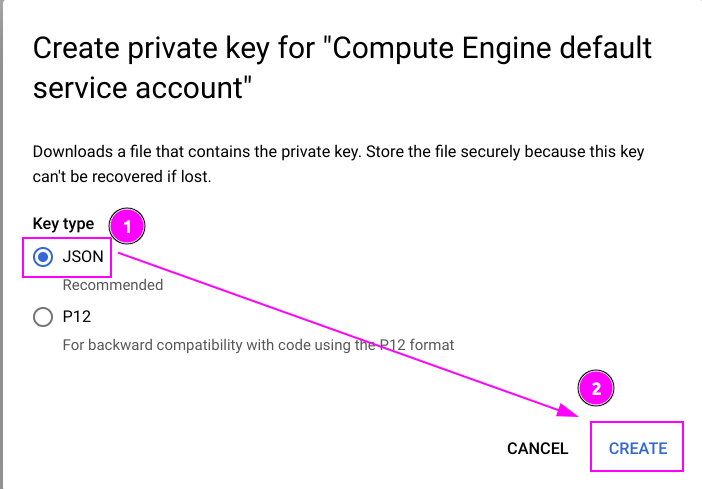
- Select
JSONas key type; - And click on
CREATE.
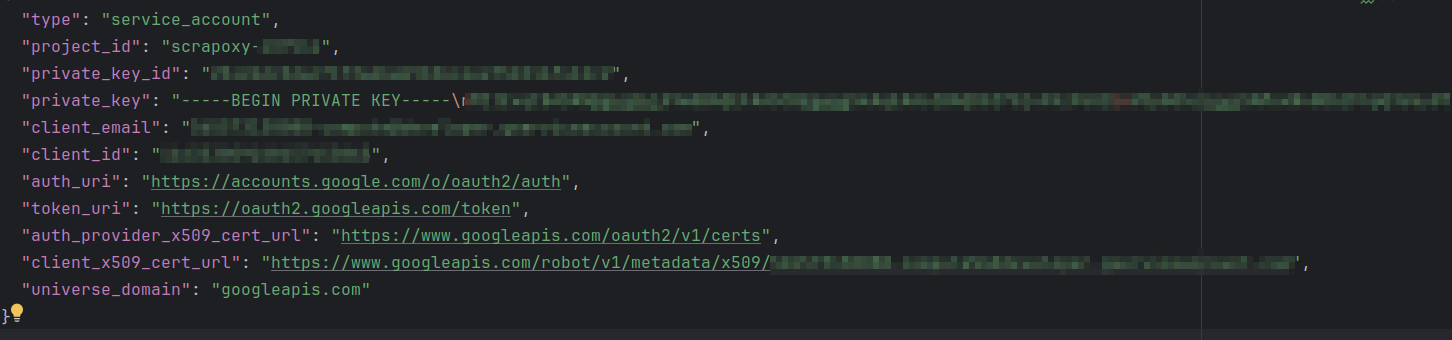
Open the downloaded file and copy the content in the clipboard.
INFO
The copied content will be paste into Scrapoxy with the Clipboard button (see below).
Scrapoxy
Open Scrapoxy User Interface and select Marketplace:
Step 1: Create a new credential
Select GCP to create a new credential (use search if necessary).
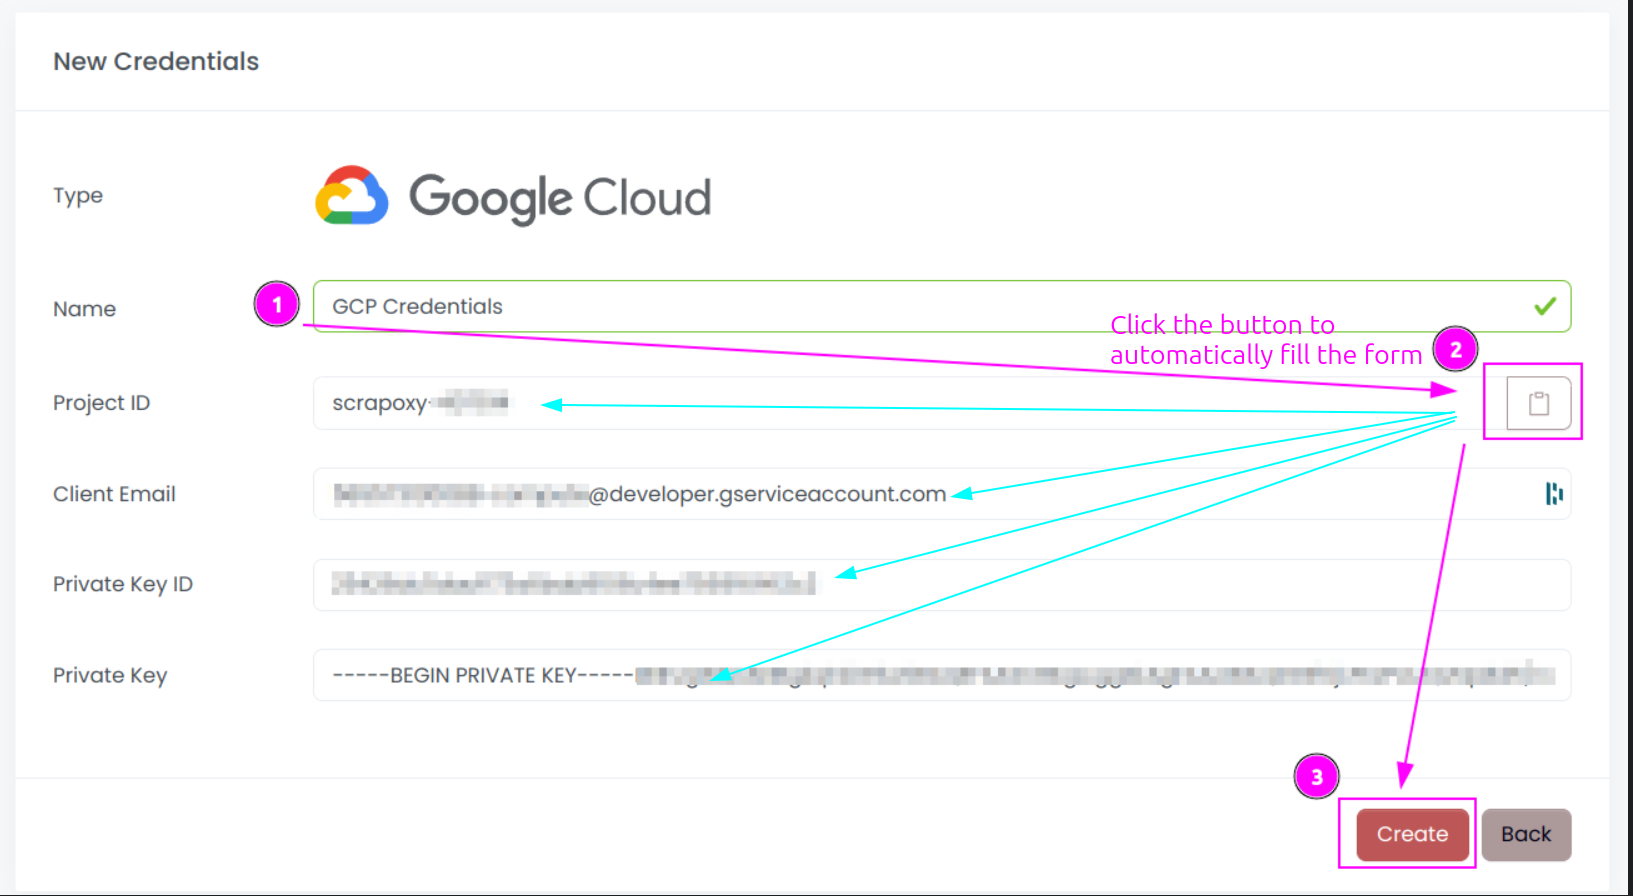
- Complete the Name of the credential;
- Click on the
Clipboardicon to paste the JSON content previously copied. It will automatically complete the form; - Click on
Create.
TIP
It is recommended to copy and paste the credential from the JSON file to prevent any potential typing errors.
Step 2: Create a new connector
Create a new connector and select GCP as provider:

Complete the form with the following information:
- Credential: The previous credential;
- Name: The name of the connector;
- # Proxies: The number of instances to create;
- Zone: The region where the instances will be created;
- Port: The port of the proxy (on GCP);
- Machine Type: The type of the instance;
- Template Name: The name of the template to use;
- Network Name: The name of the network to use;
- Label: The default label to tag instance;
- Firewall Name: The name of the firewall rule.
And click on Create.
TIP
You can retain most of the default values if they are suitable for your use case.
Step 3: Install the connector
WARNING
Do not reuse an installation from a prior setup: Scrapoxy embeds a unique TLS certificate within the instance image to secure communication and communication with the Master will fail.
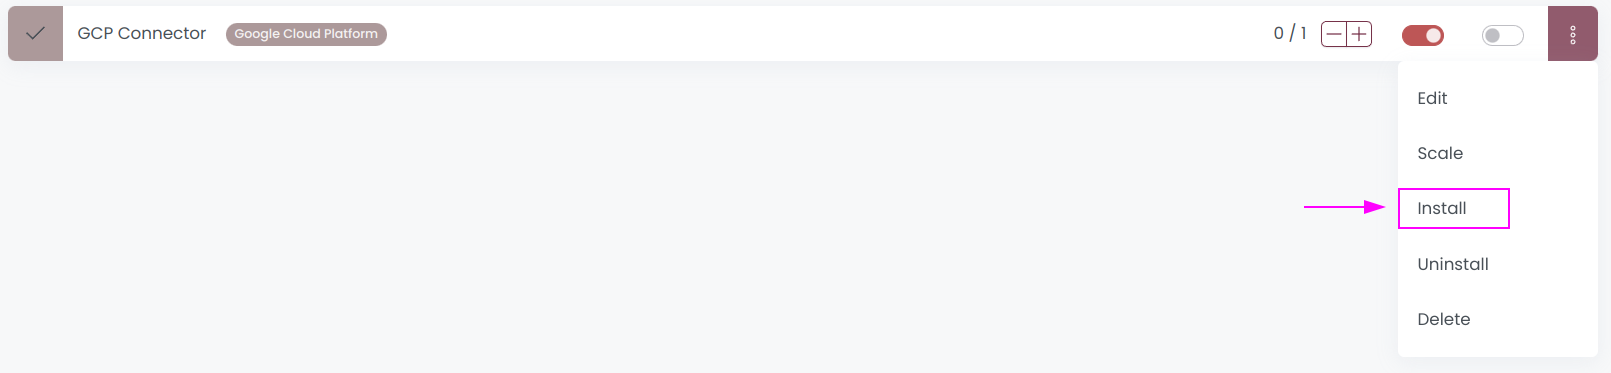
On the connector list, click on Install.
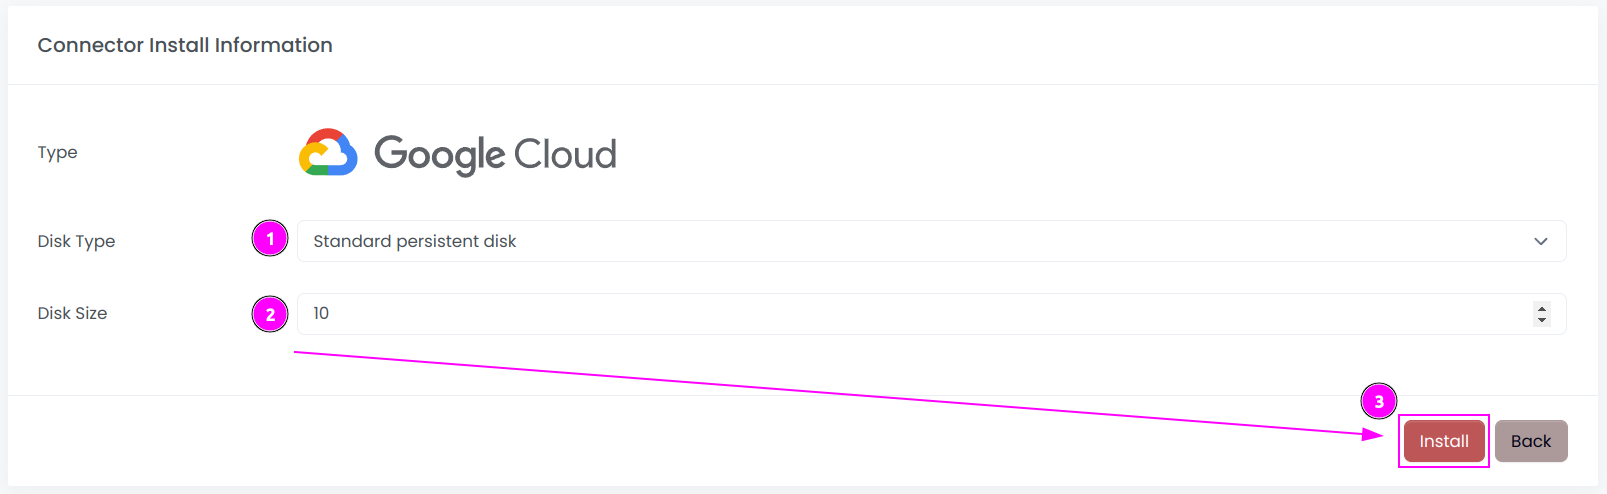
Complete the form with the following information:
- Disk Type: The type of the disk;
- Disk Size: The size of the disk (in GB).
And click on Install.
TIP
You can retain most of the default values if they are suitable for your use case.
Scrapoxy will start, install and stop the VM to create a custom image.
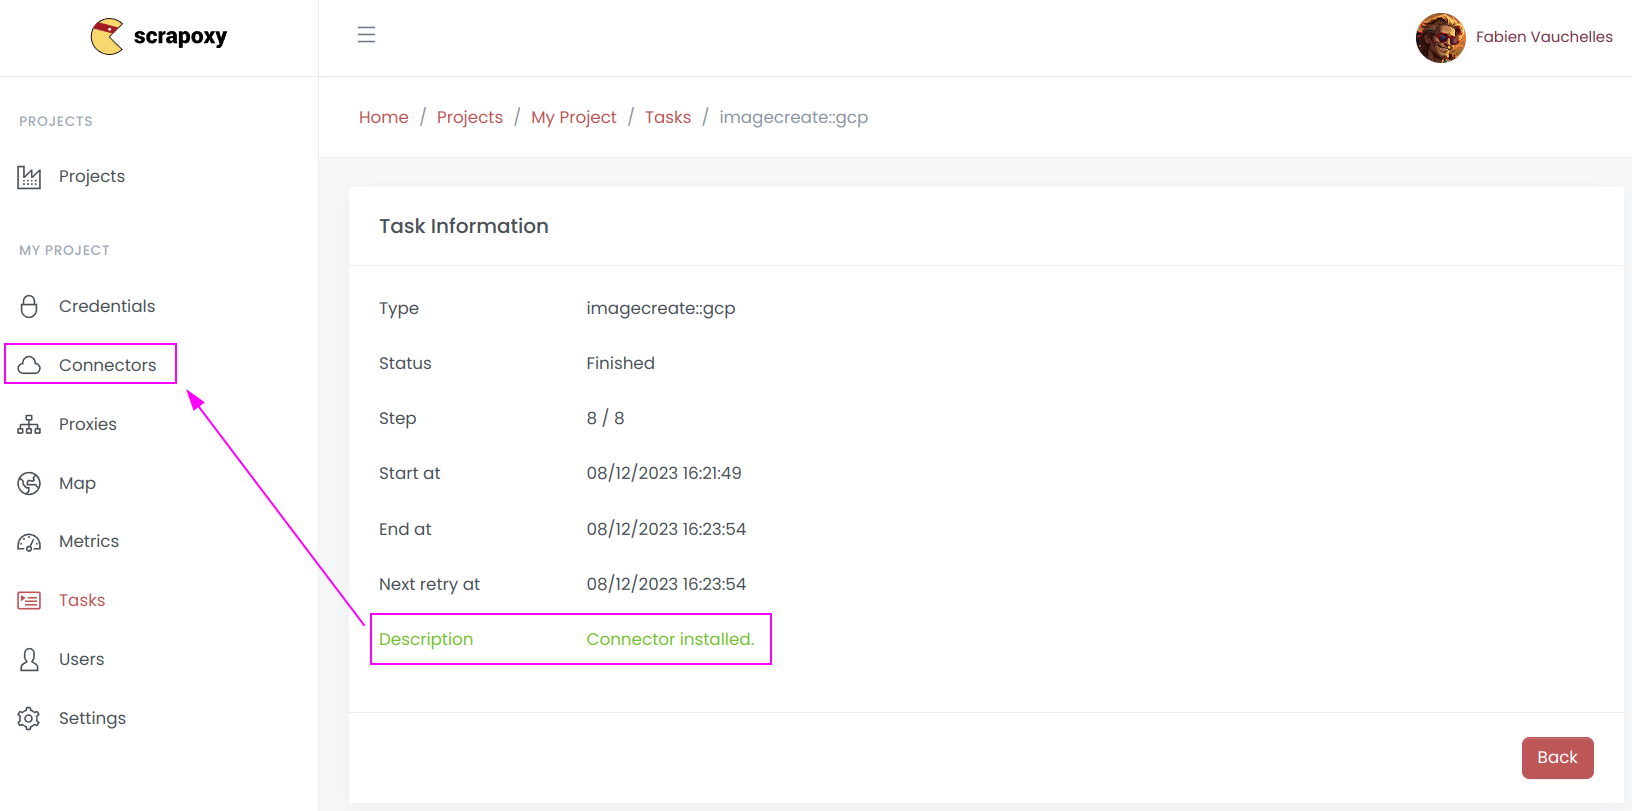
When the installation is finished, click on Connectors.

- Start the project;
- Start the connector.
TIP
Installation creates a custom image for this region. If you have multiple regions across multiple connectors, you must perform the installation step for each region.
Other: Uninstall the connector

- Stop the connector;
- Wait for proxies to be removed.
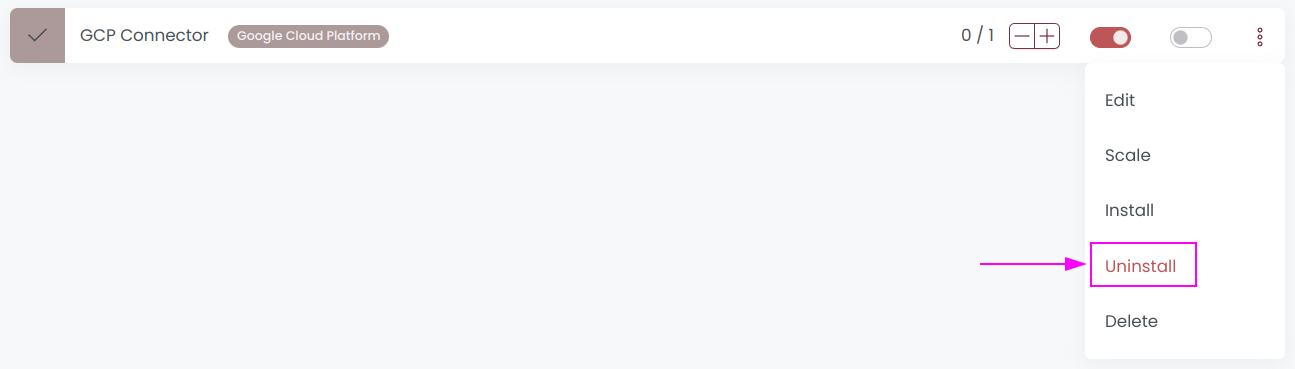
On the connector list, click on Uninstall.
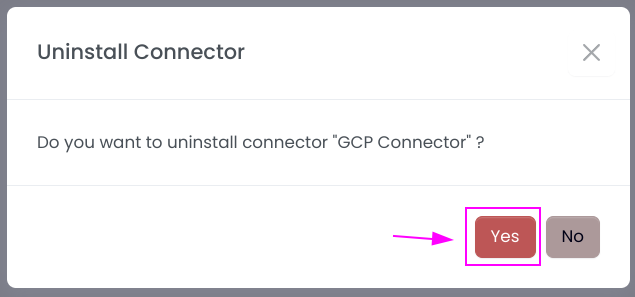
Confirm the uninstallation.
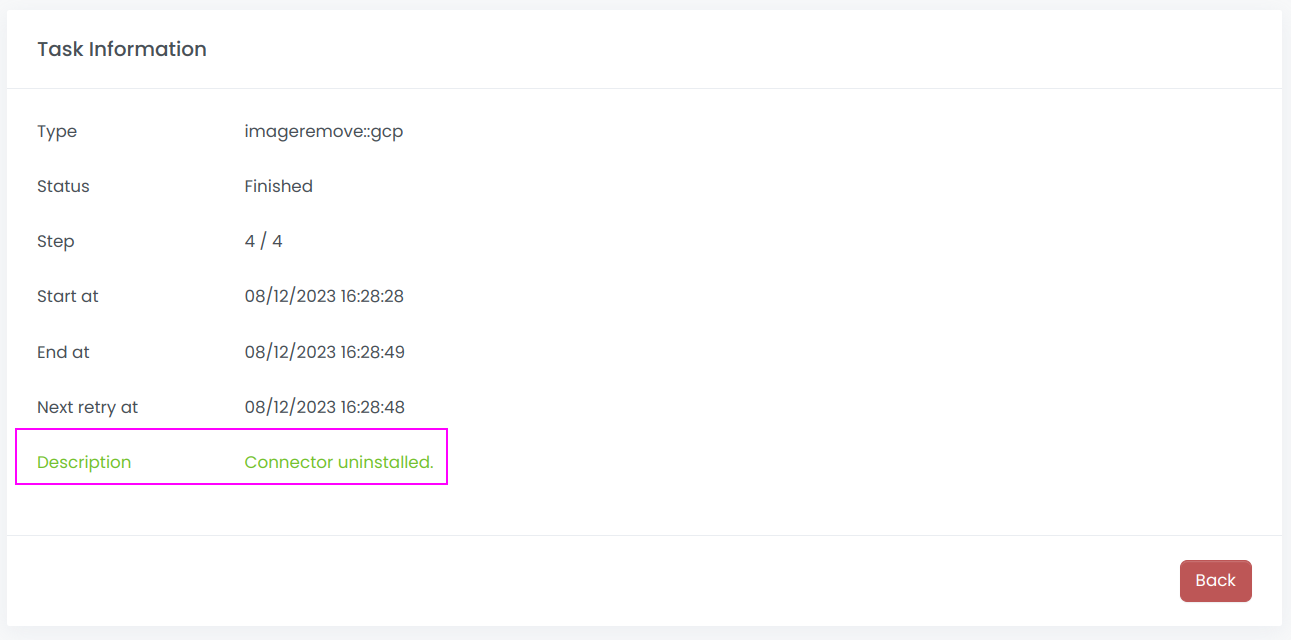
Wait for the uninstallation to finish: Scrapoxy will delete the custom image.