
 Scrapoxy
XProxy Connector

XProxy creates a secure proxy that supports HTTP, SOCKS5, IPv4, IPv6 with 4G/5G dongles.
Prerequisites
Before using XProxy, ensure the following prerequisites are met:
- Obtain XProxy materials and subscribe to the service.
- Ensure that Scrapoxy has access to the XProxy admin interface and proxy IP addresses.
WARNING
Be aware that XProxy employees have SSH root access to the material, and the password cannot be changed.
It is recommended to deploy the XProxy box behind a firewall in a DMZ (Demilitarized Zone). This configuration enables control over inbound connections to the box while preventing any outbound connections to your internal network.
XProxy Admin
Connect to your XProxy hardware UI and remember the URL.
Get the credentials
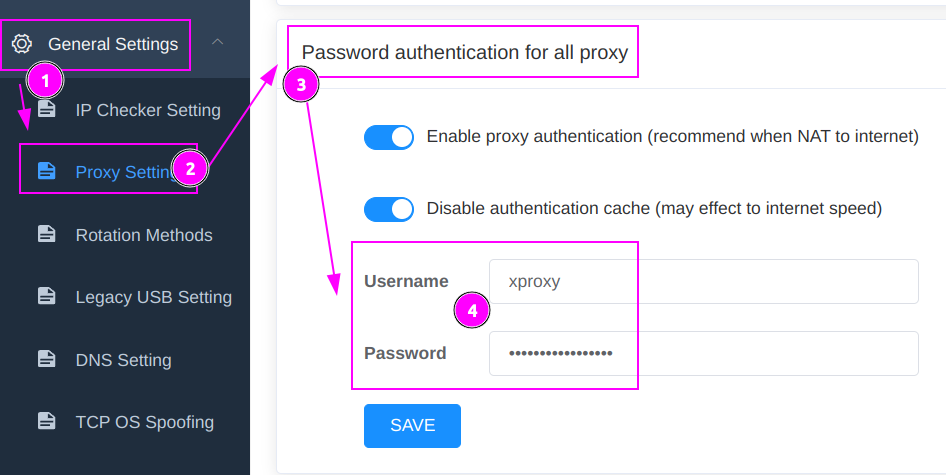
- Click on
General Settings; - Select
Proxy Settings; - Navigate to
Password authentication for all proxy; - Remember
UsernameandPasswordfor the proxy.
WARNING
The password can only be changed and not viewed.
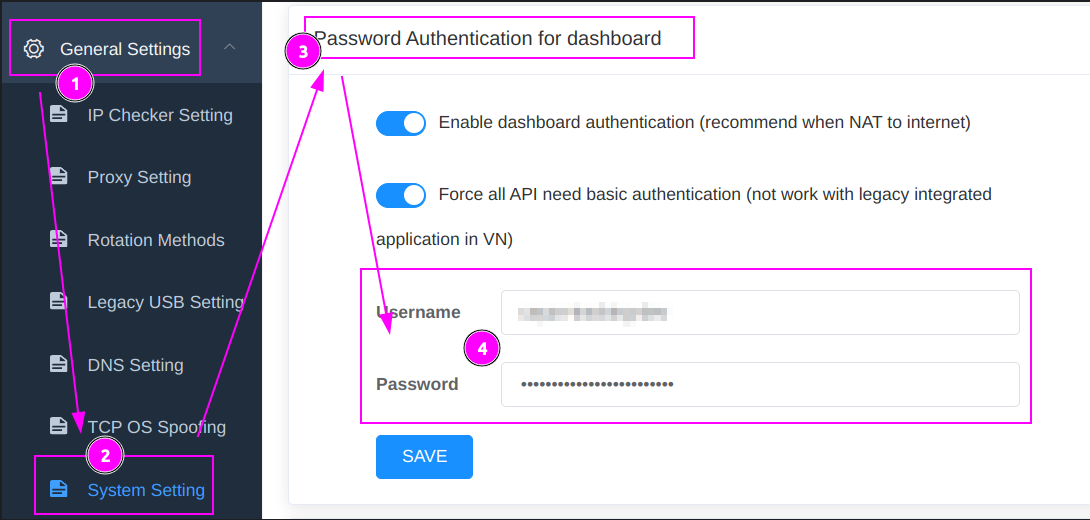
- Click on
General Settings; - Select
System Settings; - Navigate to
Password Authentication for dashboardy; - Remember
UsernameandPasswordfor the API.
WARNING
The password can only be changed and not viewed.
Scrapoxy
Open Scrapoxy User Interface and select Marketplace:
Step 1: Create a new credential
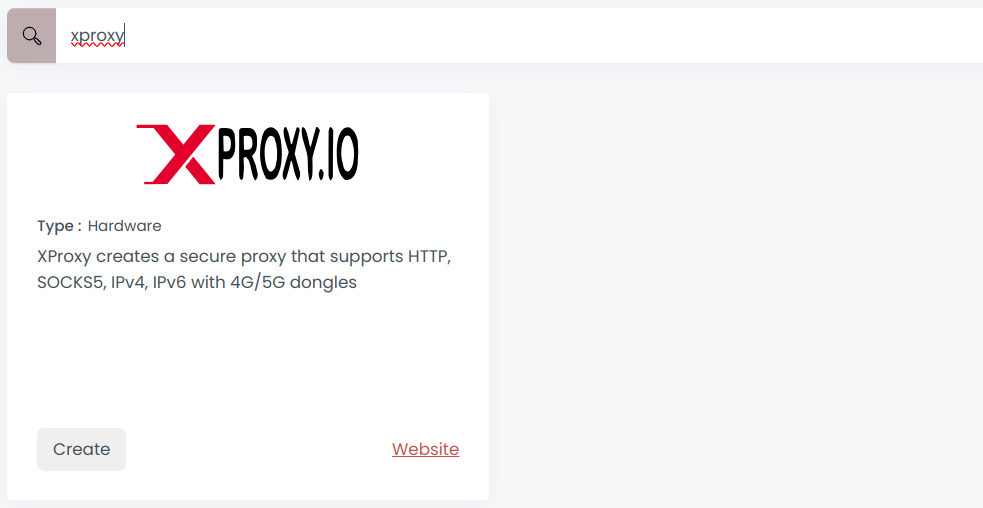
Select XProxy to create a new credential (use search if necessary).
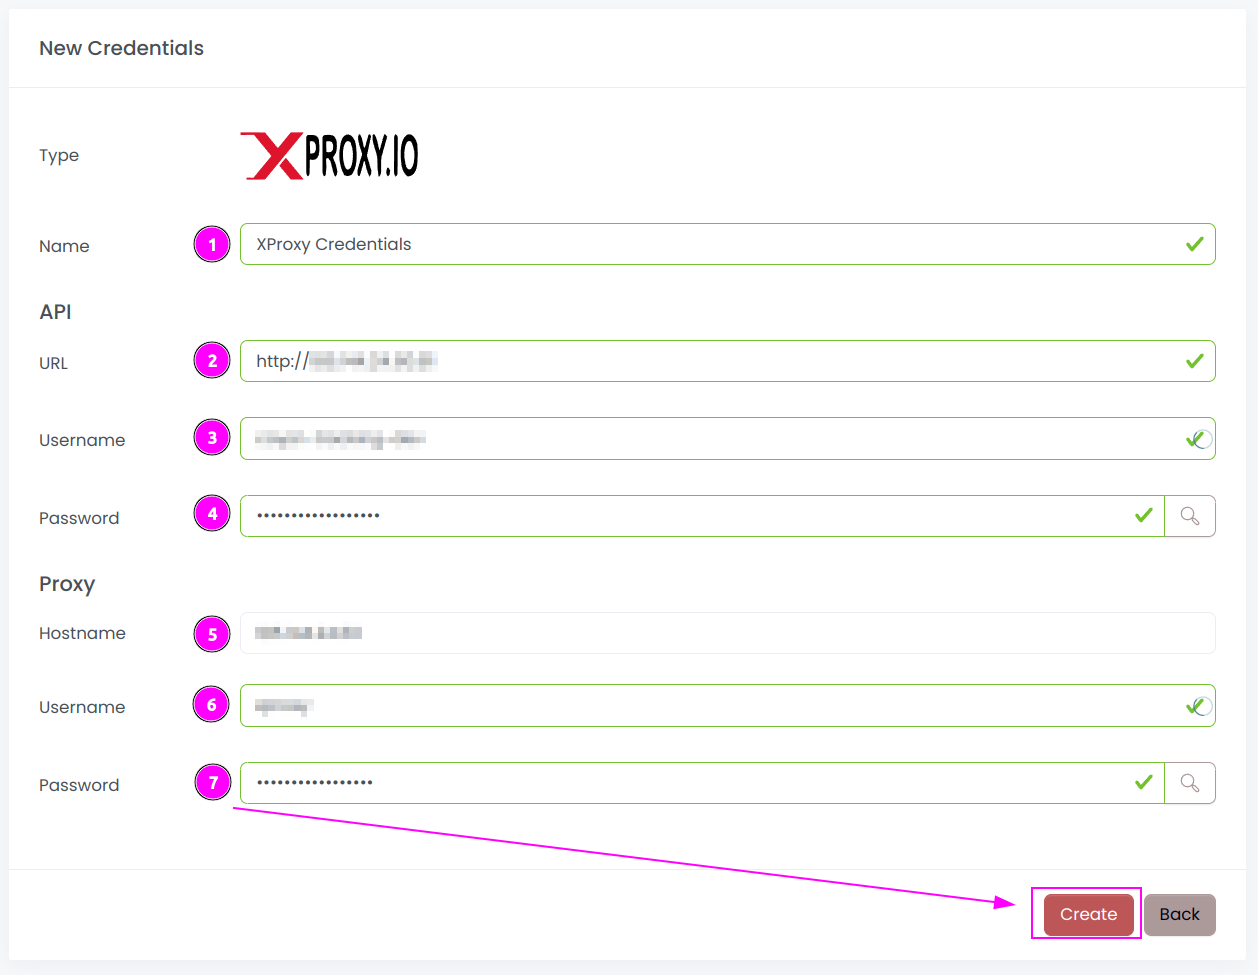
Complete the form with the following information:
- Name: The name of the credential;
- API URL: URL of the XProxy Admin (without trailing
/); - API Username: The username for the API;
- API Password: The password for the API;
- Proxy Username: The username of the proxy;
- Proxy Password: The password of the proxy;
And click on Create.
Step 2: Create a new connector
Create a new connector and select XProxy as provider:
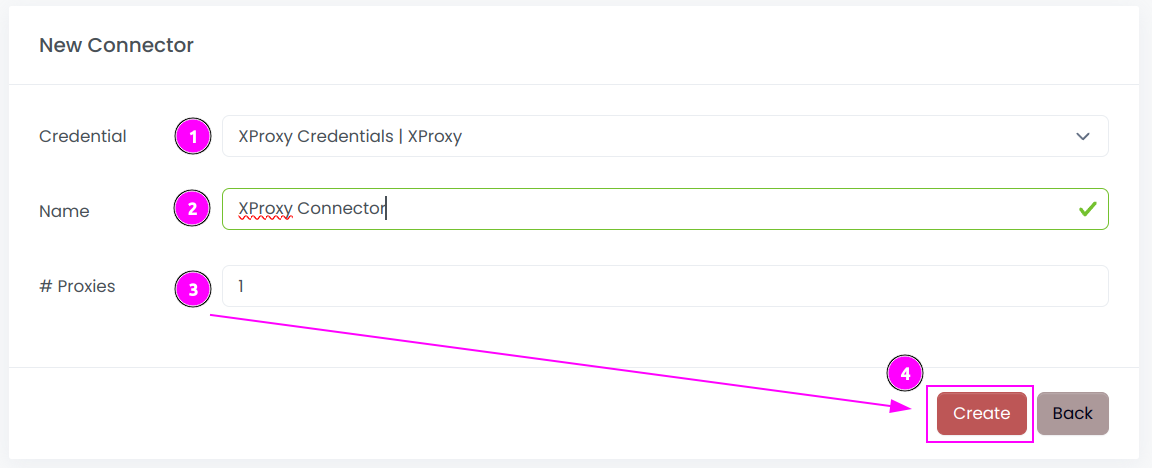
Complete the form with the following information:
- Credential: The previous credential;
- Name: The name of the connector;
- # Proxies: The number of instances to create.
And click on Create.
Step 3: Start the connector
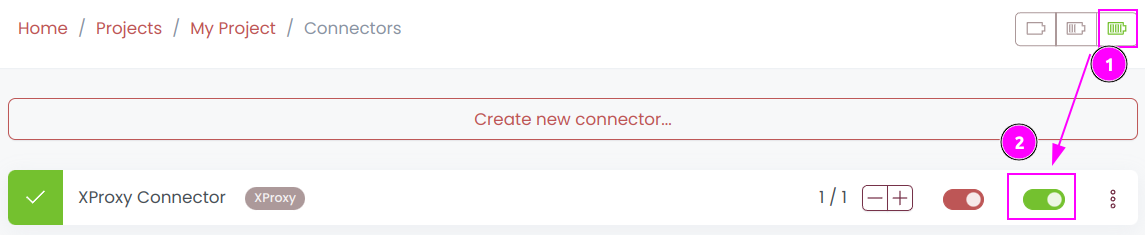
- Start the project;
- Start the connector.
Step 4: Interact with modems

Within this connector, you can perform 2 actions on the proxies:
- Trash button: Initiates a fast rotation of the modem;
- Cross button: Triggers a slower process, rebooting the modem.
Other: Stop the connector

- Stop the connector;
- Wait for proxies to be removed.