
 Scrapoxy
Google Authentication

Google Cloud Platform is a cloud computing services that runs on the same infrastructure that Google uses internally.
GCP Console
Connect to Console.
Step 1: Create new project (optional)
INFO
If you already have a scrapoxy project, you can skip this step.
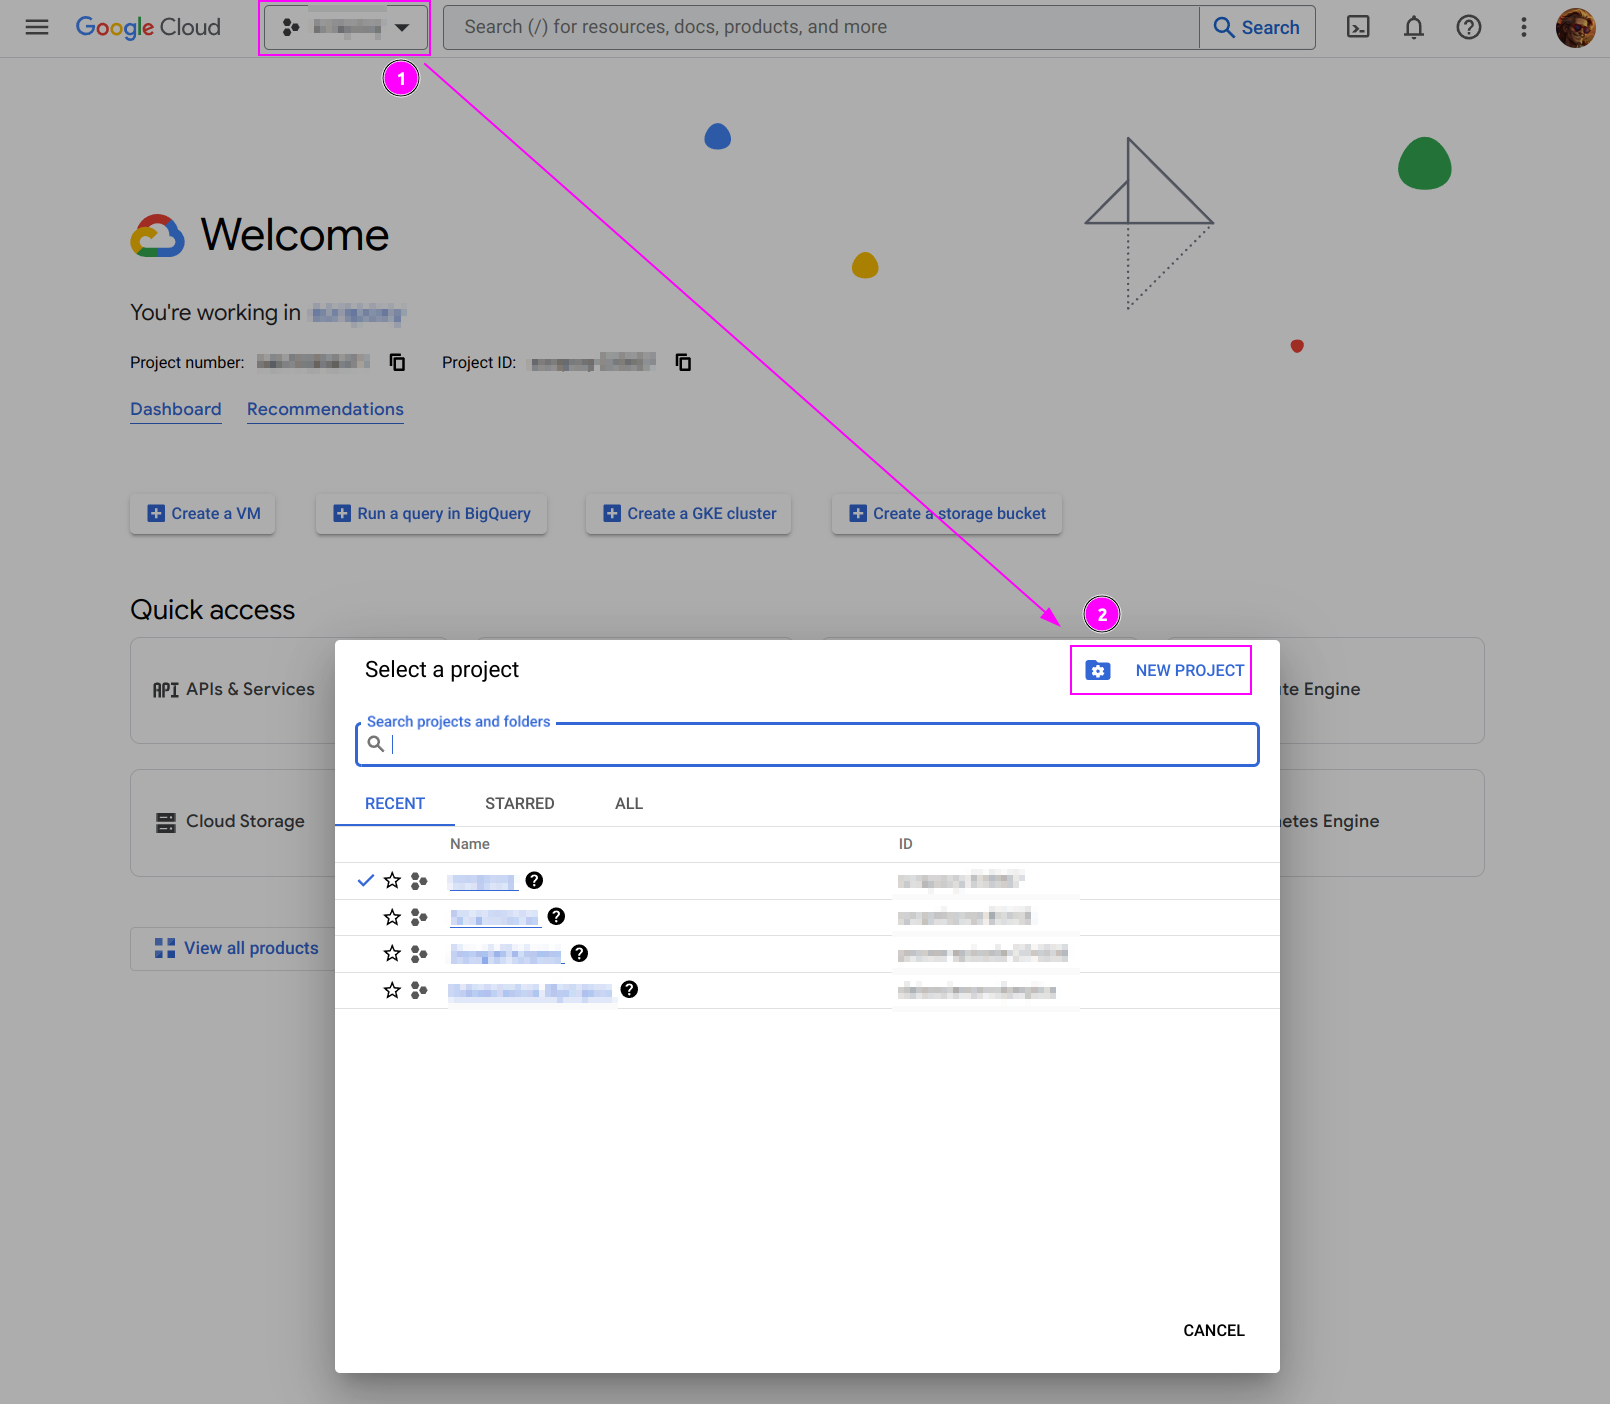
- On the top left, click on the current project
- And click on
NEW PROJECT.
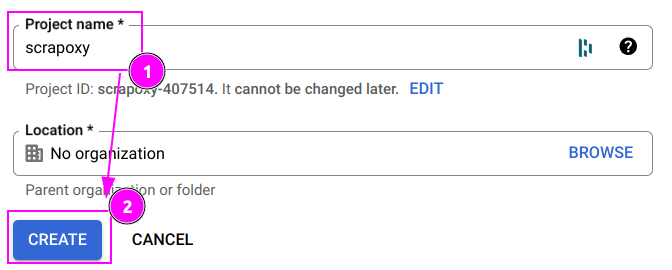
- Enter
scrapoxyas Project name; - And click on
CREATE.
Wait for the project to be created. A notification appears when it's done:
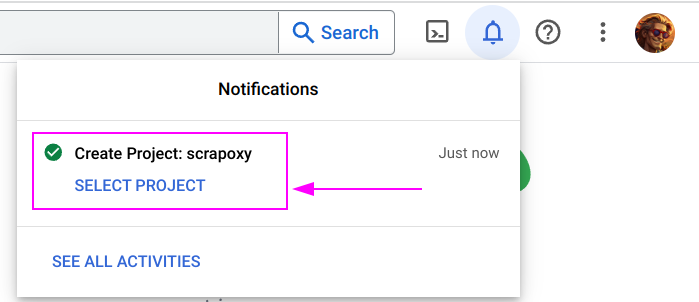
Click on SELECT PROJECT.
Step 2: Configure Consent Screen
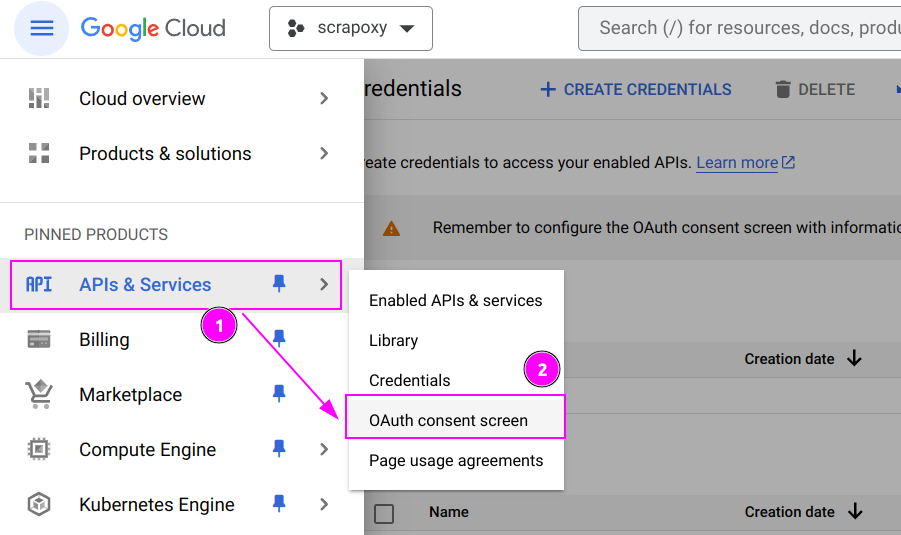
- On the left menu, click on
APIs & Services; - And click on
OAuth consent screen.
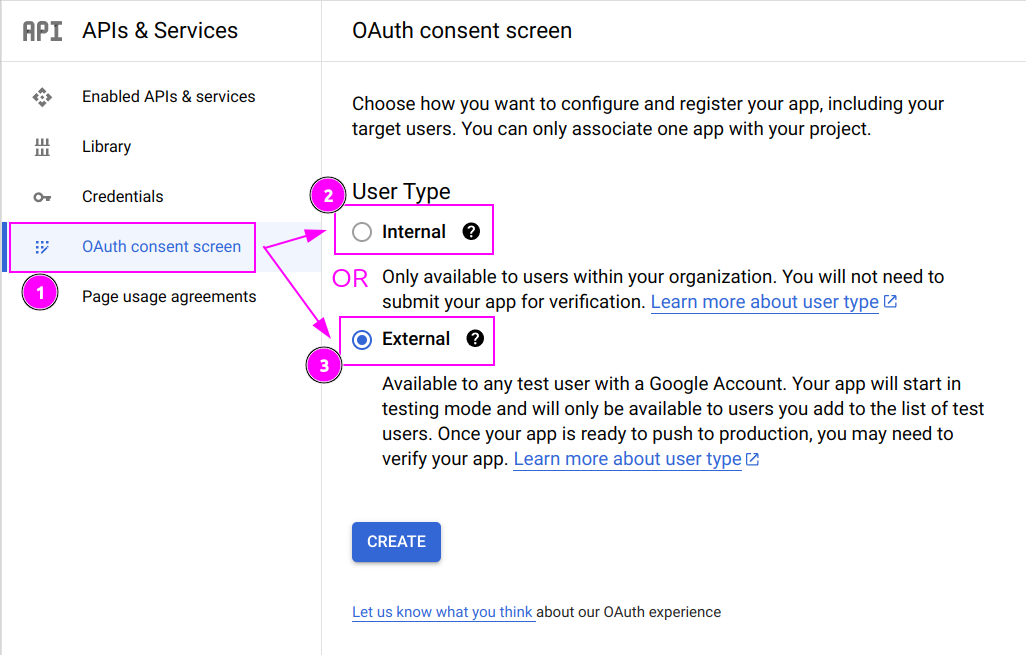
There are two types of consent screen:
- Internal: if are a company and own a G Suite account
- External: if you are a person (with a
@gmail.comaccount for example)
Select the type you want and click on CREATE.
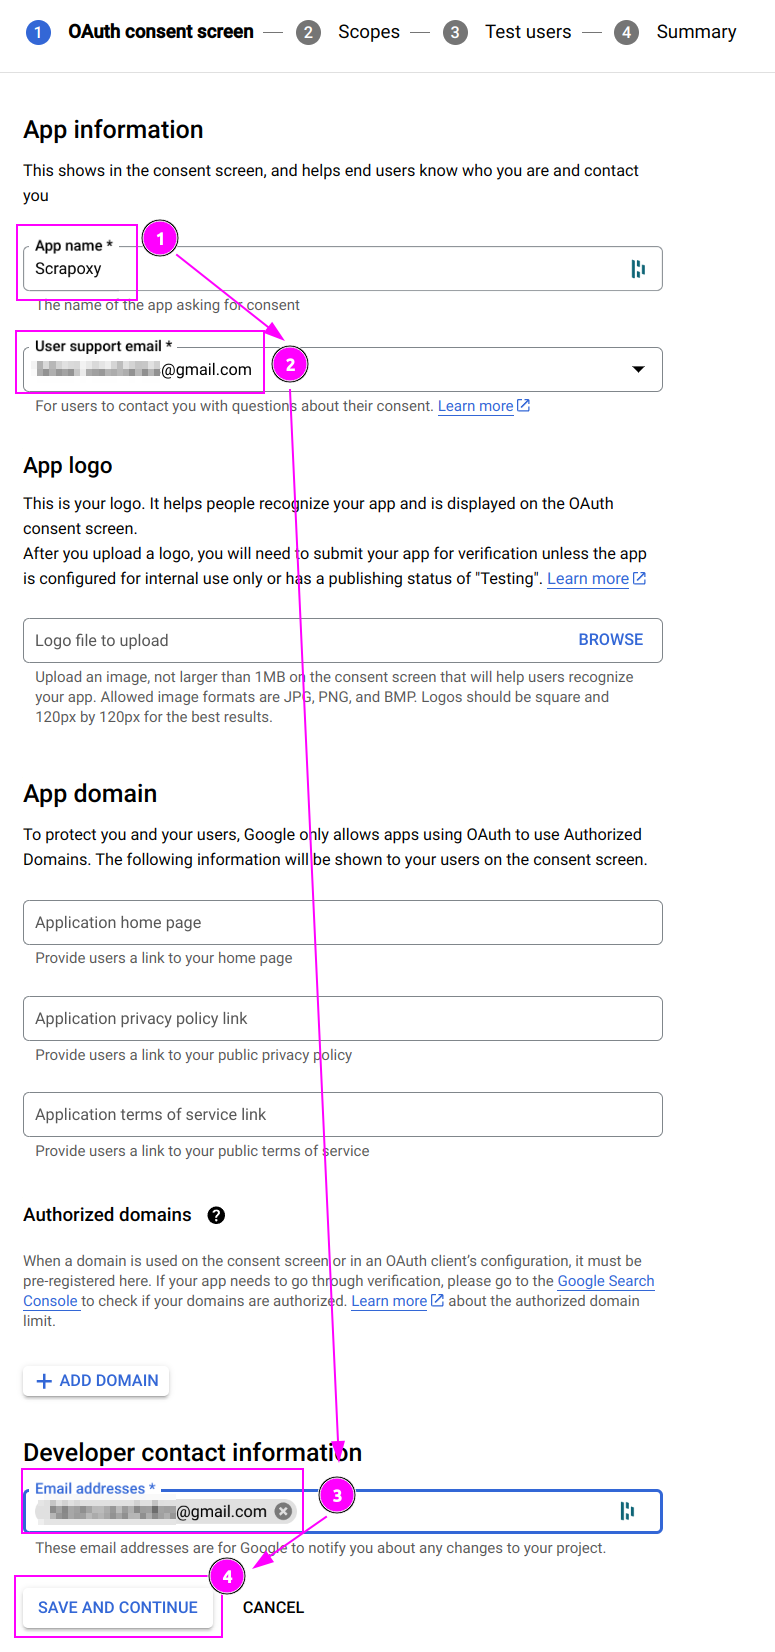
- Enter
Scrapoxyas App name; - Select your email address as User support email;
- Enter your email address as Developer contact information;
- And click on
SAVE AND CONTINUE.
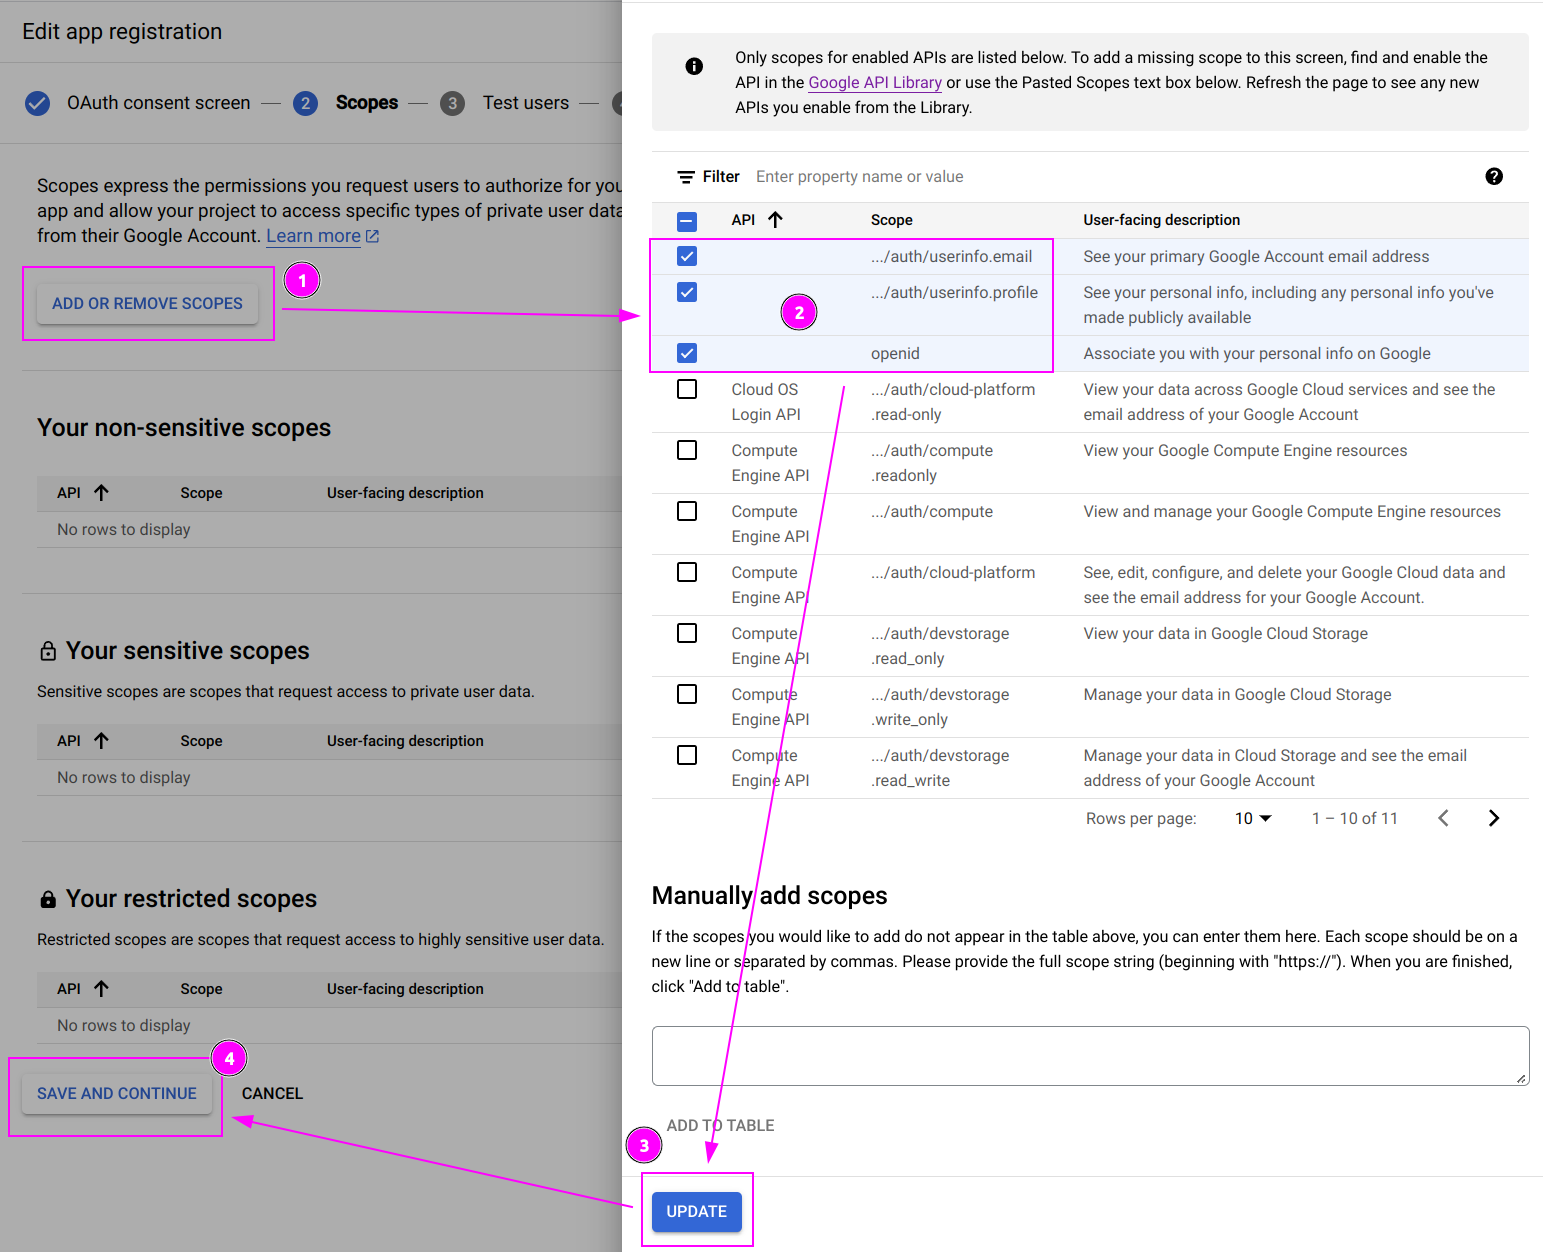
- Click on
ADD OR REMOVE SCOPES; - Select the following scopes:
/auth/usersinfo.email/auth/userinfo.profile/openid
- Click on
UPDATE. - And click on
SAVE AND CONTINUE.
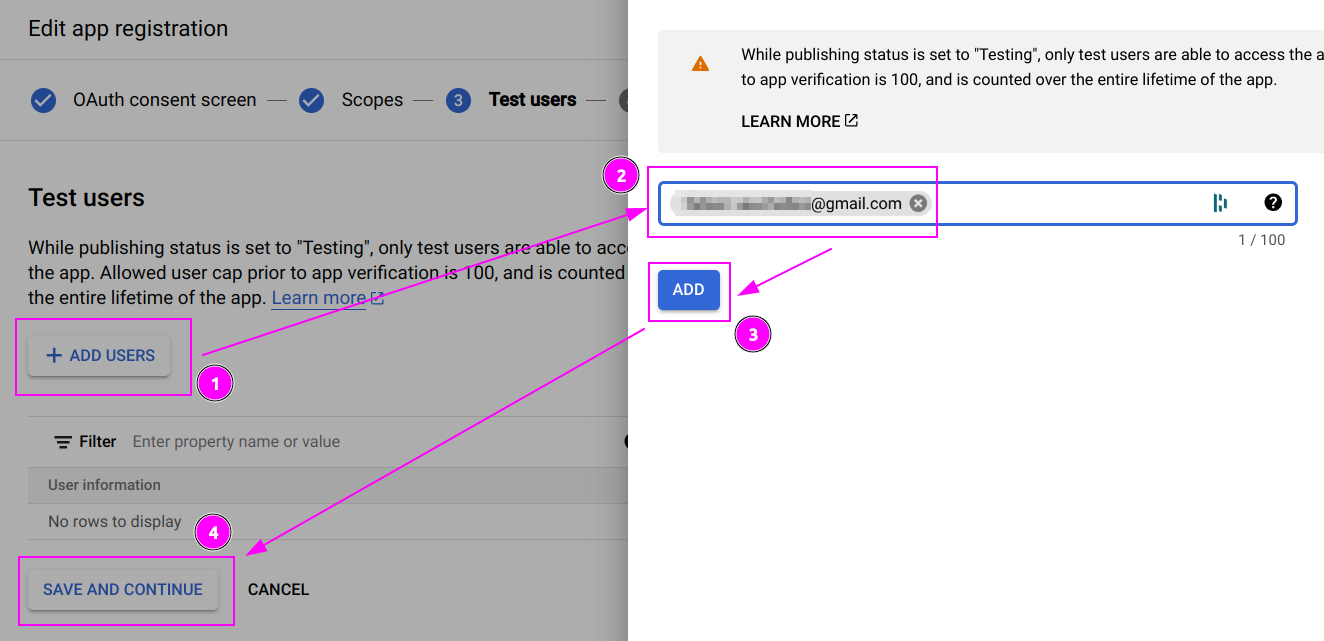
- Click on
ADD USERS; - If you have an external account, enter the gmail address of the person you want to access to Scrapoxy (including your address);
- Click on
ADD. - And click on
SAVE AND CONTINUE.

Click on BACK TO DASHBOARD.
Step 3: Add client
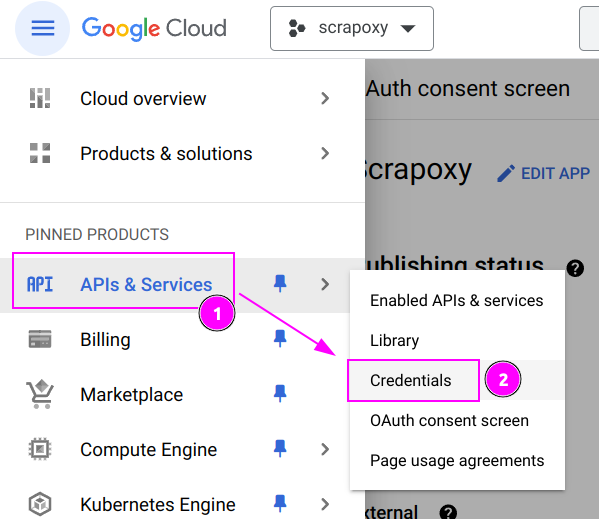
- On the left menu, click on
APIs & Services; - And click on
Credentials.
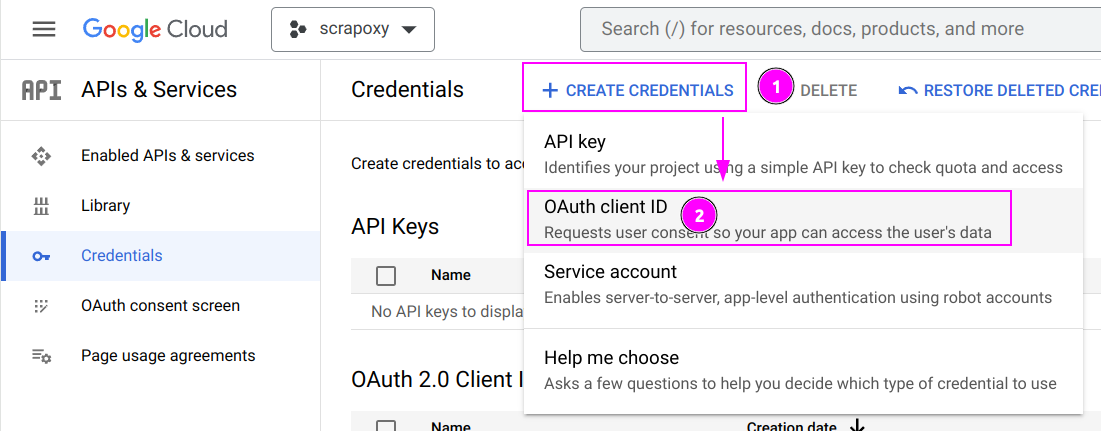
- Click on
+ CREATE CREDENTIALS; - And click on
OAuth client ID.
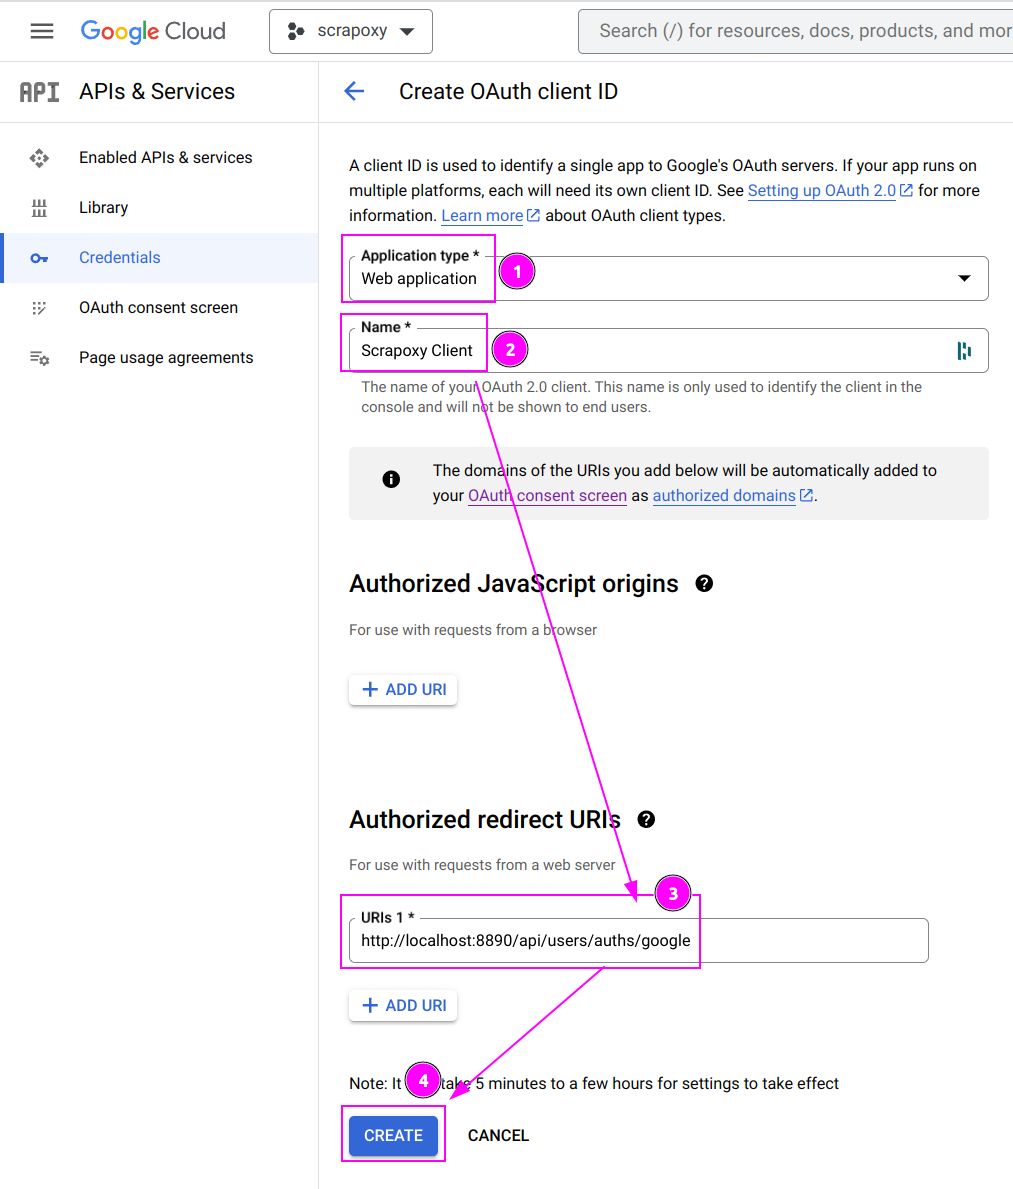
- Select
Web applicationas Application type; - Enter
Scrapoxy Clientas Name; - Enter
http://localhost:8890/api/users/auths/googleas Authorized redirect URIs (replacehttp://localhost:8890by the external URL of your Scrapoxy instance) - And click on
CREATE.
INFO
Google only accepts HTTPS URLS.
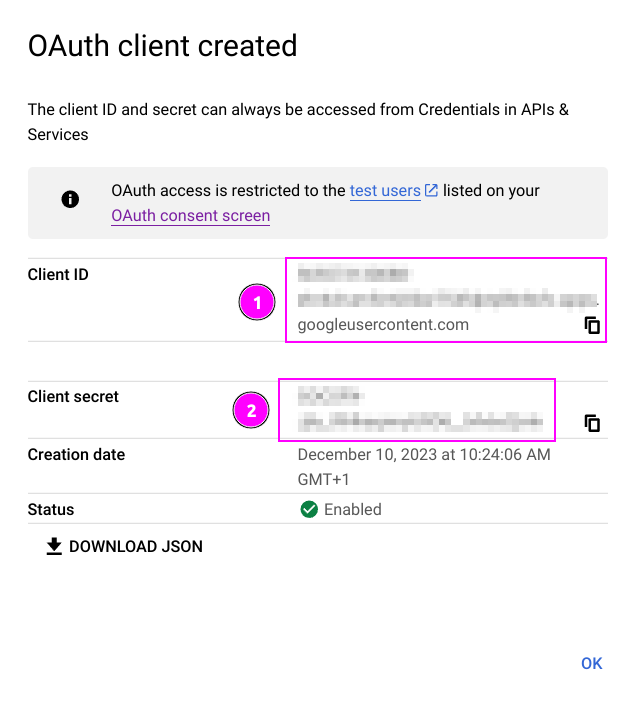
- Remember the Client ID;
- Remember the Client secret;
Scrapoxy
With Docker
Open the terminal and run the following command:
shell
docker run -d -p 8888:8888 -p 8890:8890 -e FRONTEND_URL=http://localhost:8890 -e AUTH_GOOGLE_CLIENT_ID=my_client_id -e AUTH_GOOGLE_CLIENT_SECRET=my_client_secret -e BACKEND_JWT_SECRET=secret1 -e FRONTEND_JWT_SECRET=secret2 scrapoxy/scrapoxyReplace:
my_client_idandmy_client_secretwith the values you copied earlier;http://localhost:8890by the external URL of your Scrapoxy instance (HTTPS only).
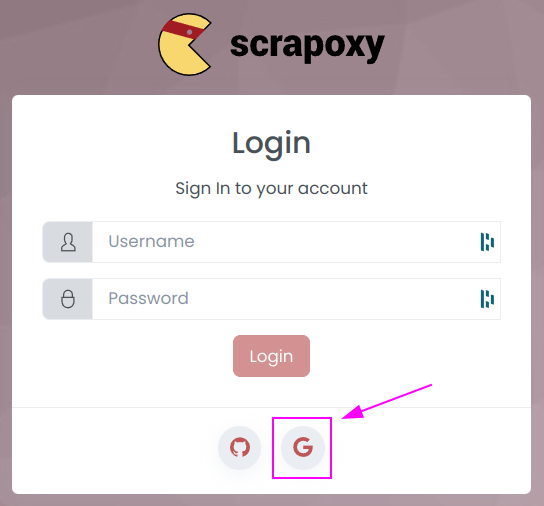
Scrapoxy will automatically bootstrap the Google authentication:
With NPM
On Linux
Open the terminal and run the following command:
shell
FRONTEND_URL=http://localhost:8890 AUTH_GOOGLE_CLIENT_ID=my_client_id AUTH_GOOGLE_CLIENT_SECRET=my_client_secret BACKEND_JWT_SECRET=secret1 FRONTEND_JWT_SECRET=secret2 npx --yes scrapoxyReplace:
my_client_idandmy_client_secretwith the values you copied earlier;http://localhost:8890by the external URL of your Scrapoxy instance (HTTPS only).
On Windows
Open the Command Prompt and run the following command:
shell
set FRONTEND_URL=http://localhost:8890
set AUTH_GOOGLE_CLIENT_ID=my_client_id
set AUTH_GOOGLE_CLIENT_SECRET=my_client_secret
set BACKEND_JWT_SECRET=secret1
set FRONTEND_JWT_SECRET=secret2
npx --yes scrapoxy
Replace:
my_client_idandmy_client_secretwith the values you copied earlier;http://localhost:8890by the external URL of your Scrapoxy instance (HTTPS only).