
 Scrapoxy
Microsoft Azure Connector

Microsoft Azure is a cloud computing service created by Microsoft.
Prerequisites
An active Microsoft Azure subscription is required.
Azure Portal
Connect to Azure Portal.
Step 1: Register a new application
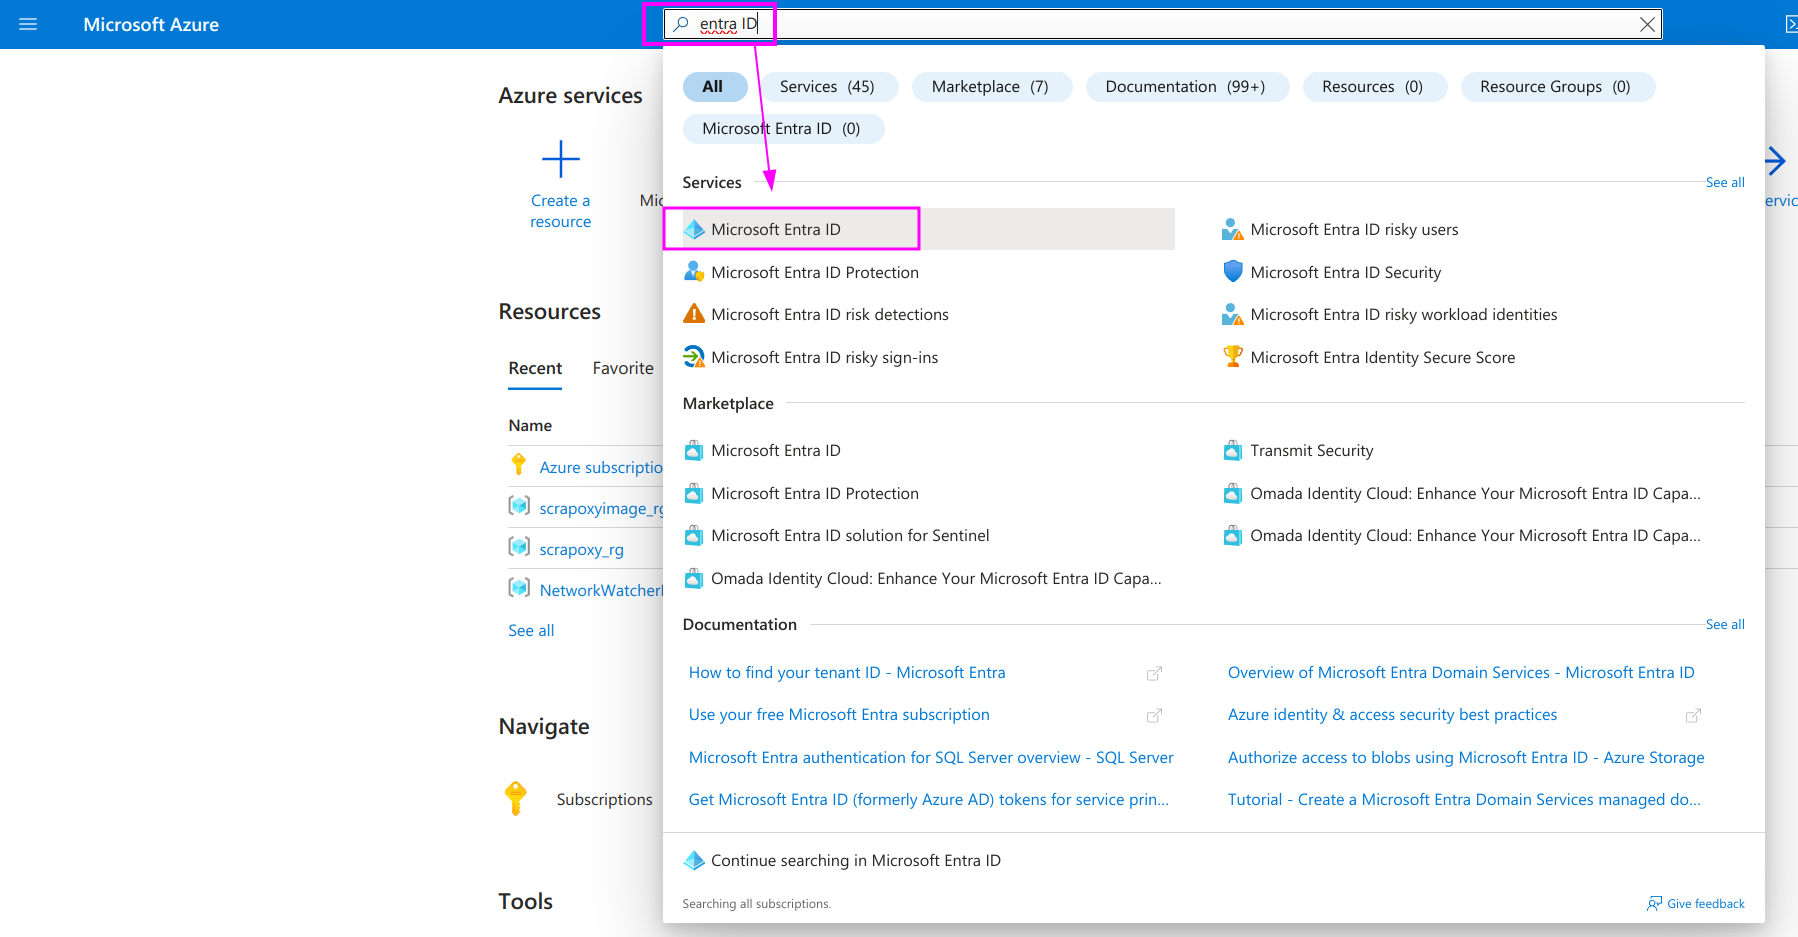
Search the Microsoft Entra ID (aka Active Directory).
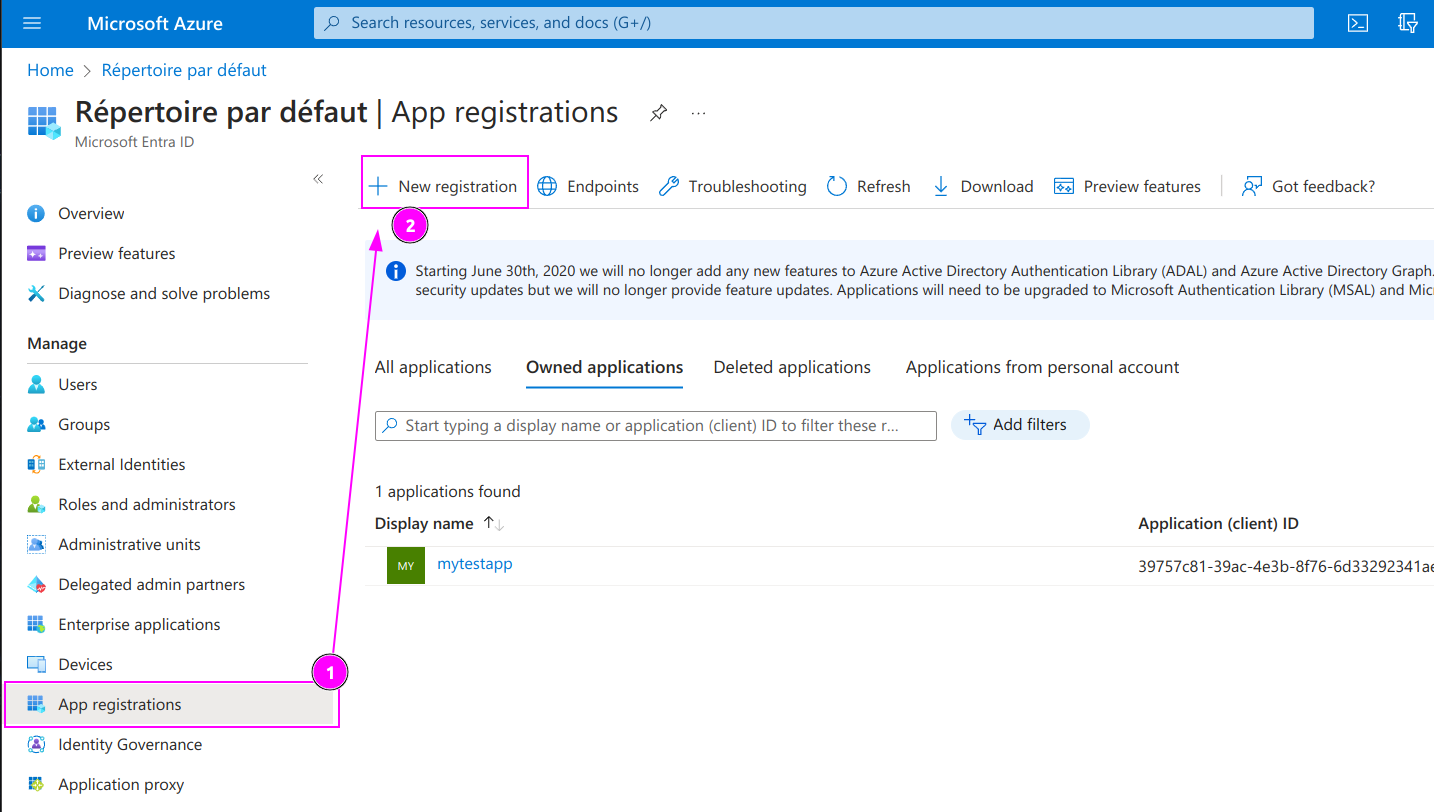
- Click on
App registrations; - And click
New registration.

Complete the form with the following information:
- Name:
scrapoxy - Supported account types:
Accounts in this organizational directory only (Microsoft only - Single tenant)
And click on Register.
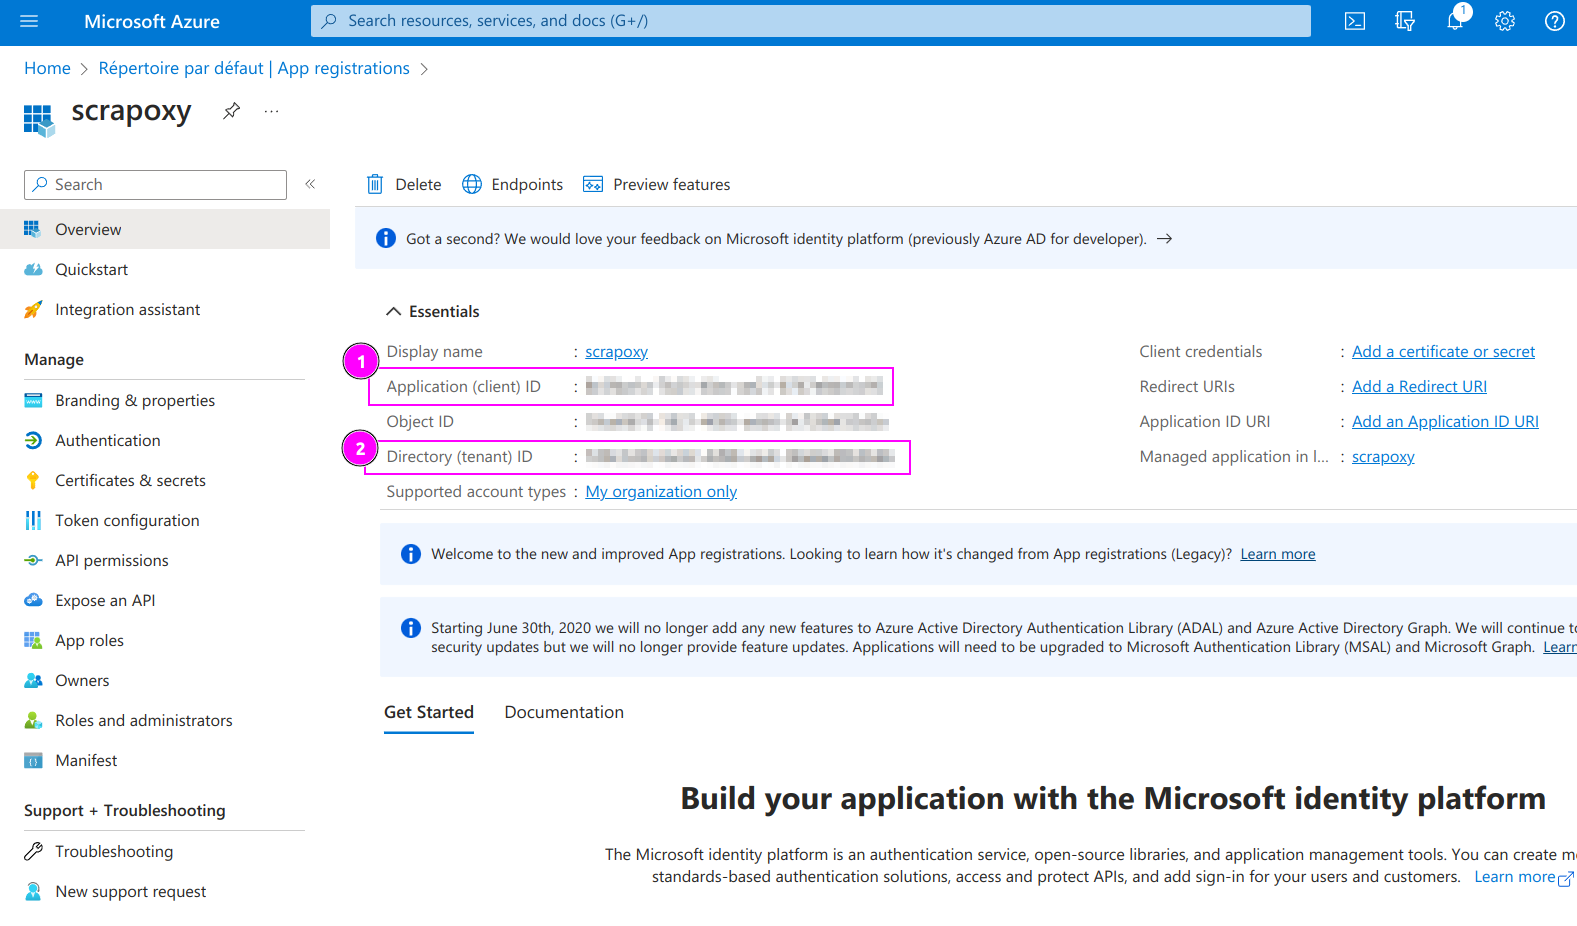
Remember:
- the
Application (client) ID; - and the
Directory (tenant) ID.
Step 2: Create a client secret
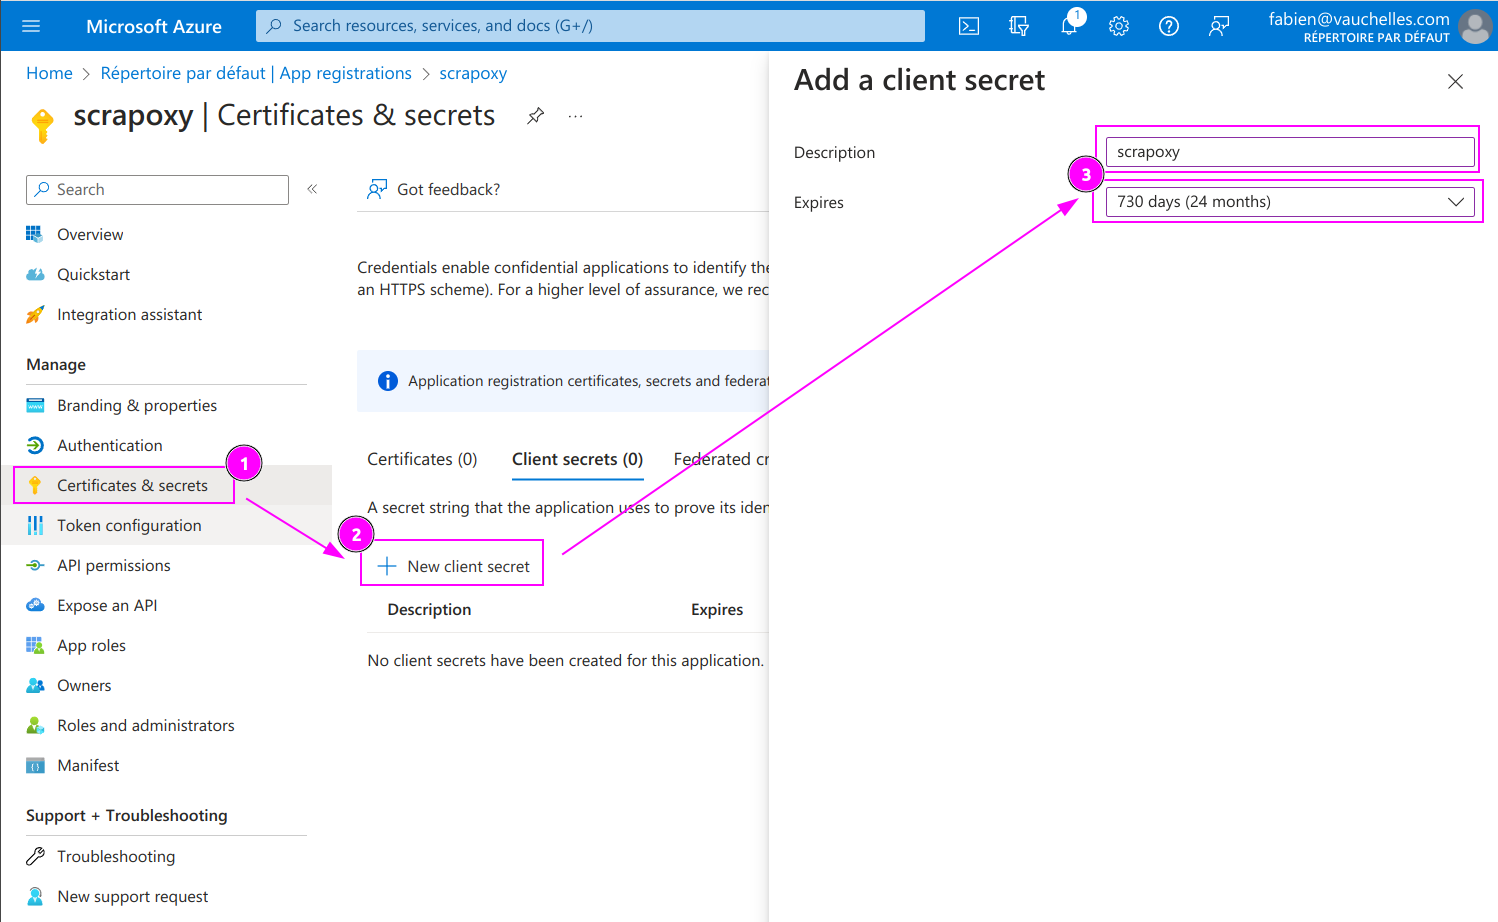
- Click on
Certificates & secrets; - Click on
New client secret; - Enter a description, select the maximum expiration time;
- Click on
Add.
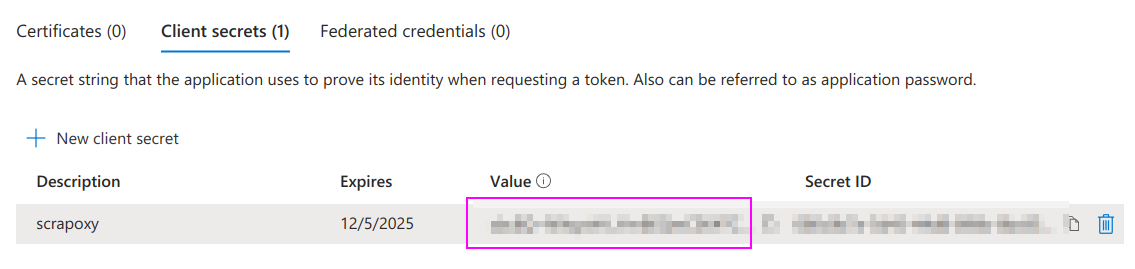
Remember the Value of the secret.
Step 3: Get your subscription ID
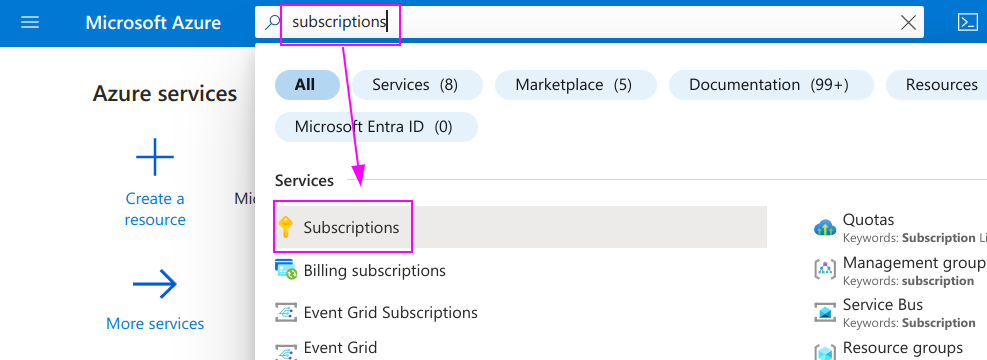
Search the Subscription.
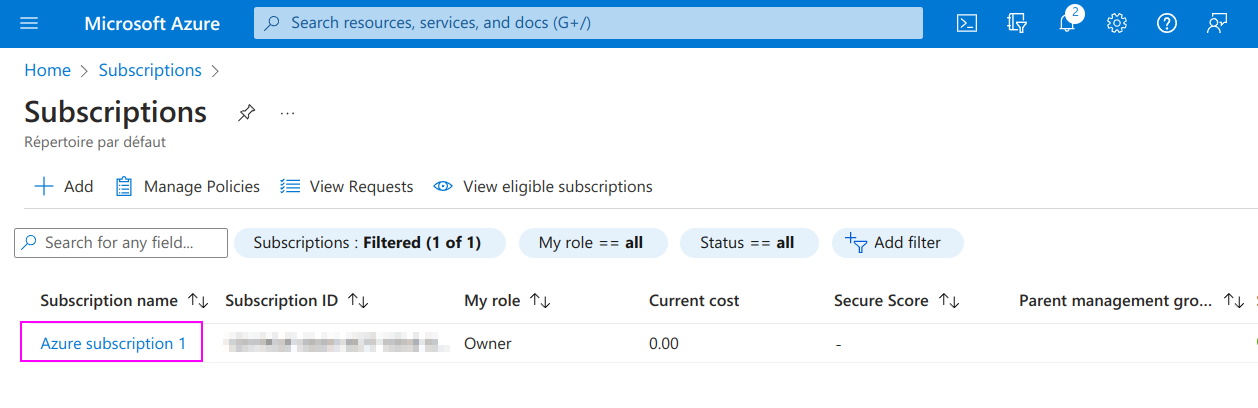
Select the first subscription.
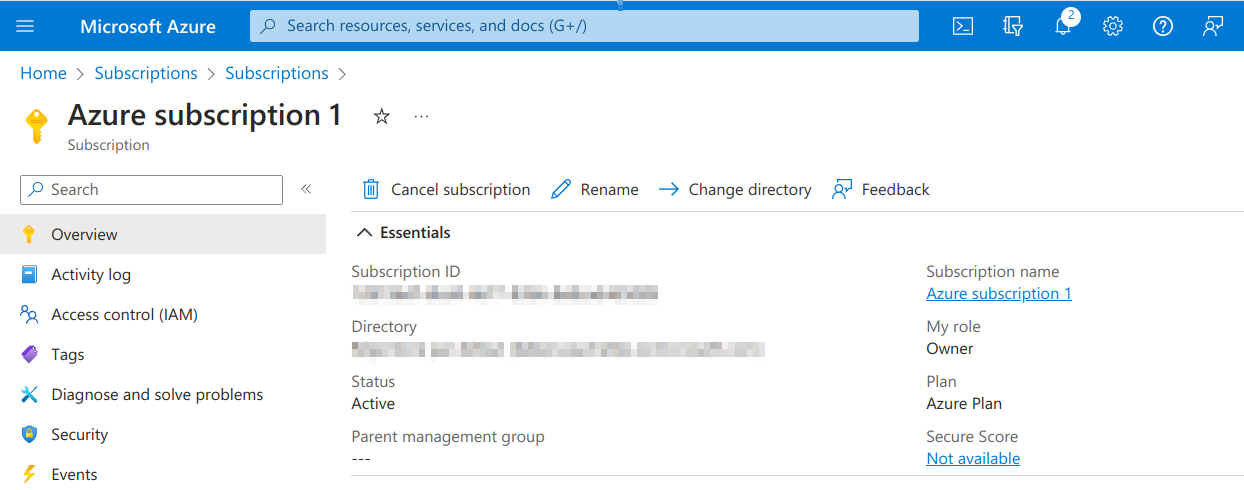
Remember the Subscription ID value.
Step 4: Add a role to the application
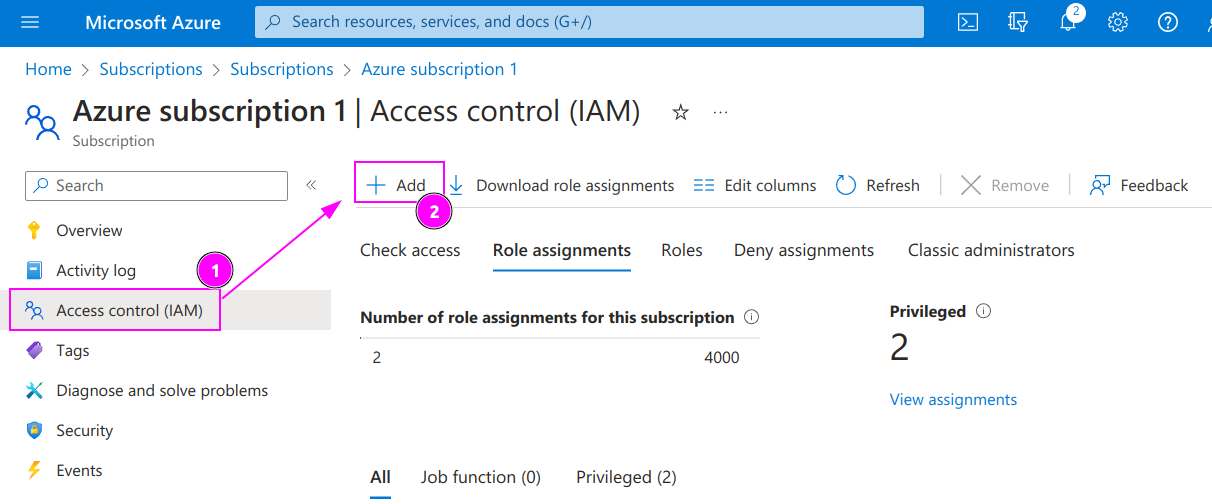
On the subscription:
- Click on
Access control (IAM); - And click on
Add.
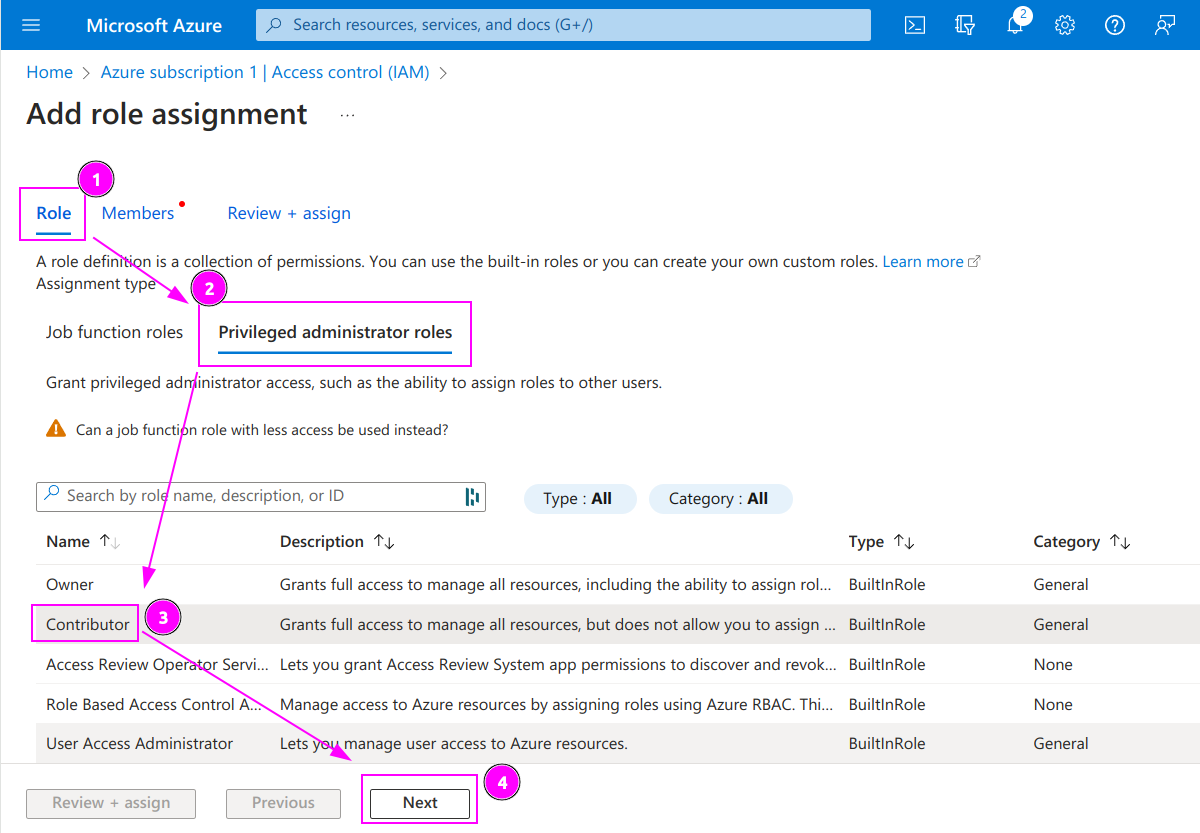
- On tab
Role; - Select
Privileged administrator roles; - Select
Contributor; - Click on
Next.
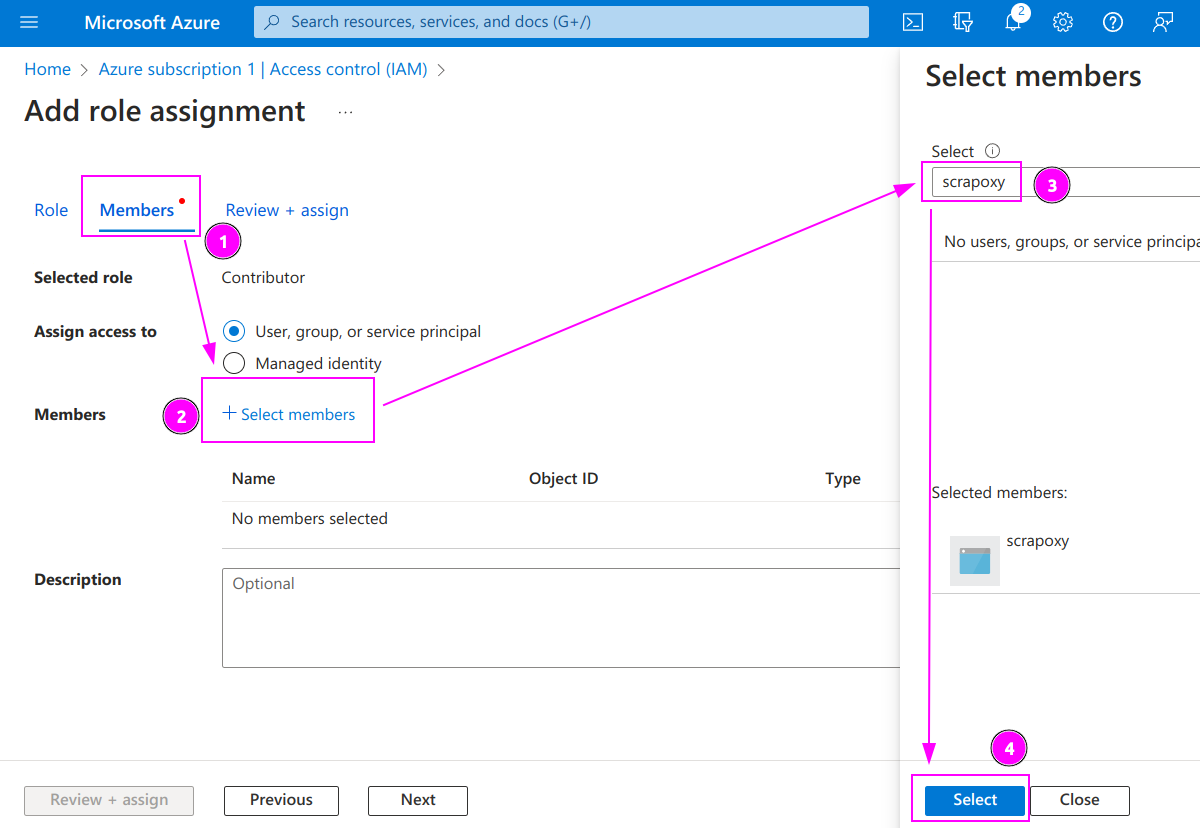
- On tab
Members; - Click on
Select members; - Select the application you created;
- Click on
Select:
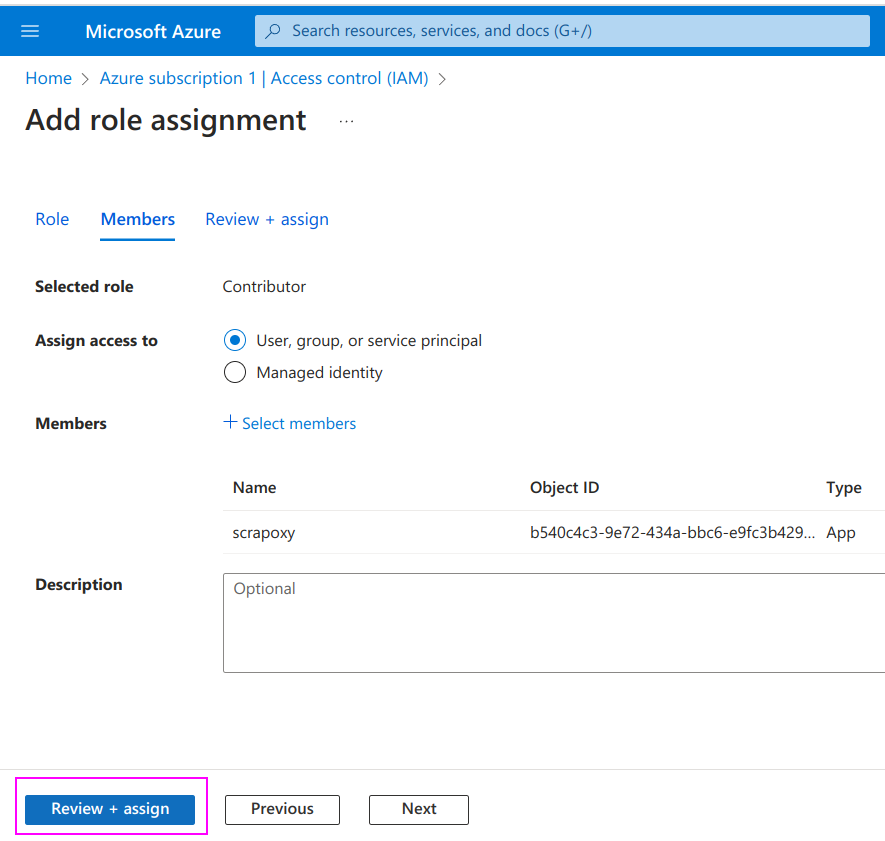
Finally, click on Review + assign 2 times.
Scrapoxy
Open Scrapoxy User Interface and select Marketplace:
Step 1: Create a new credential
Select Azure to create a new credential (use search if necessary).
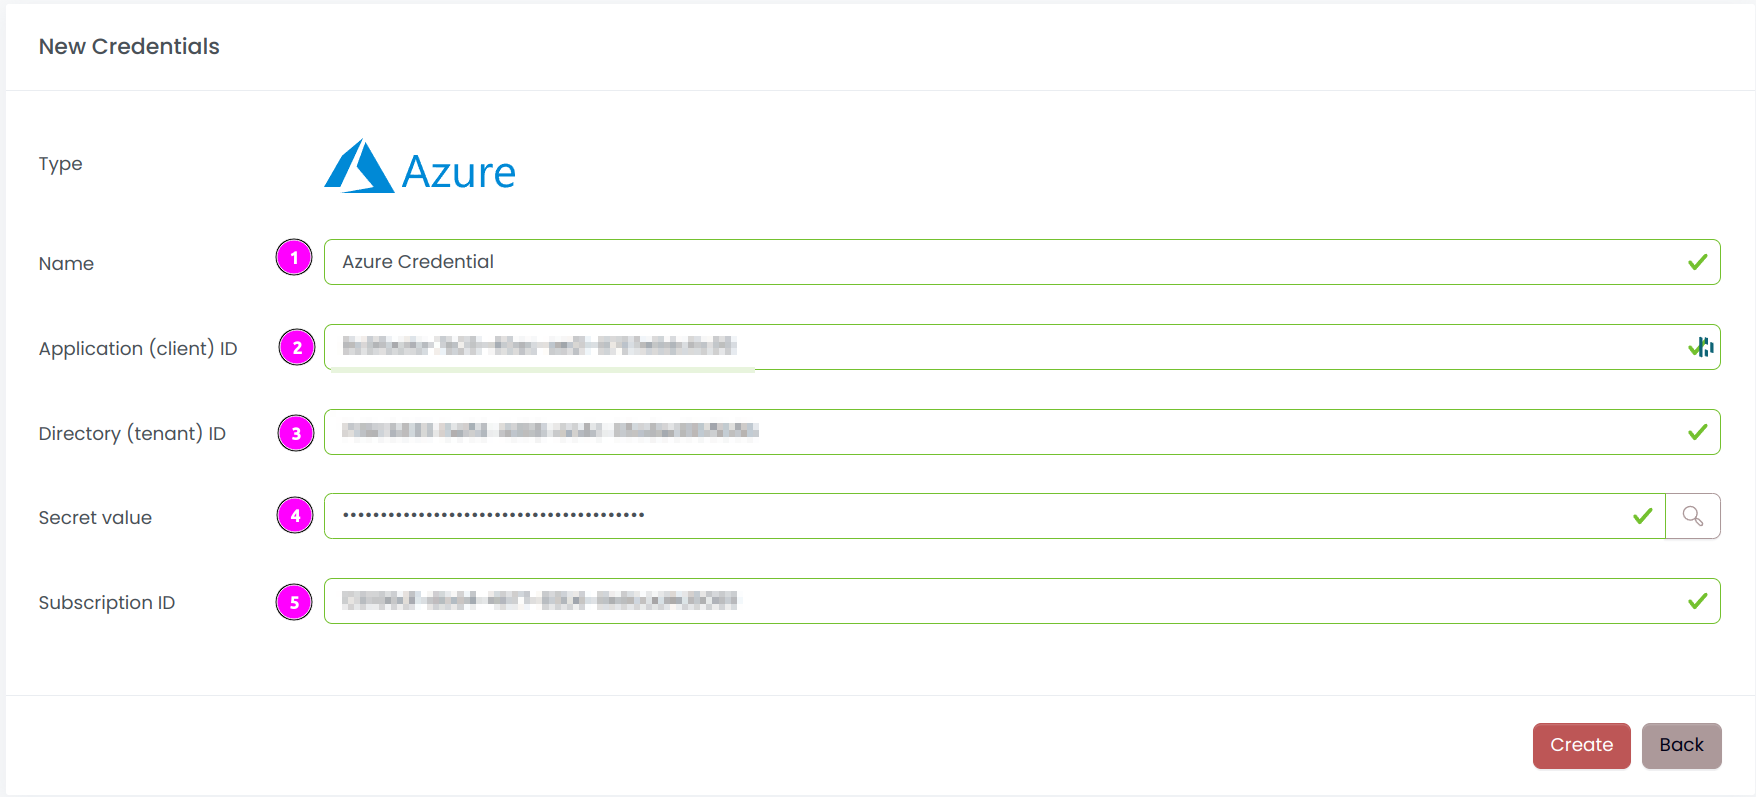
Complete the form with the following information:
- Name: The name of the credential;
- Application (client) ID: The Application ID (aka Client ID) of the application;
- Directory (tenant) ID: The Directory ID (aka Tenant ID) of the application;
- Secret value: The Client Secret of the application;
- Subscription ID: The Subscription ID.
And click on Create.
INFO
It may take Azure up to 10 minutes to reflect the changes.
Step 2: Create a new connector
Create a new connector:
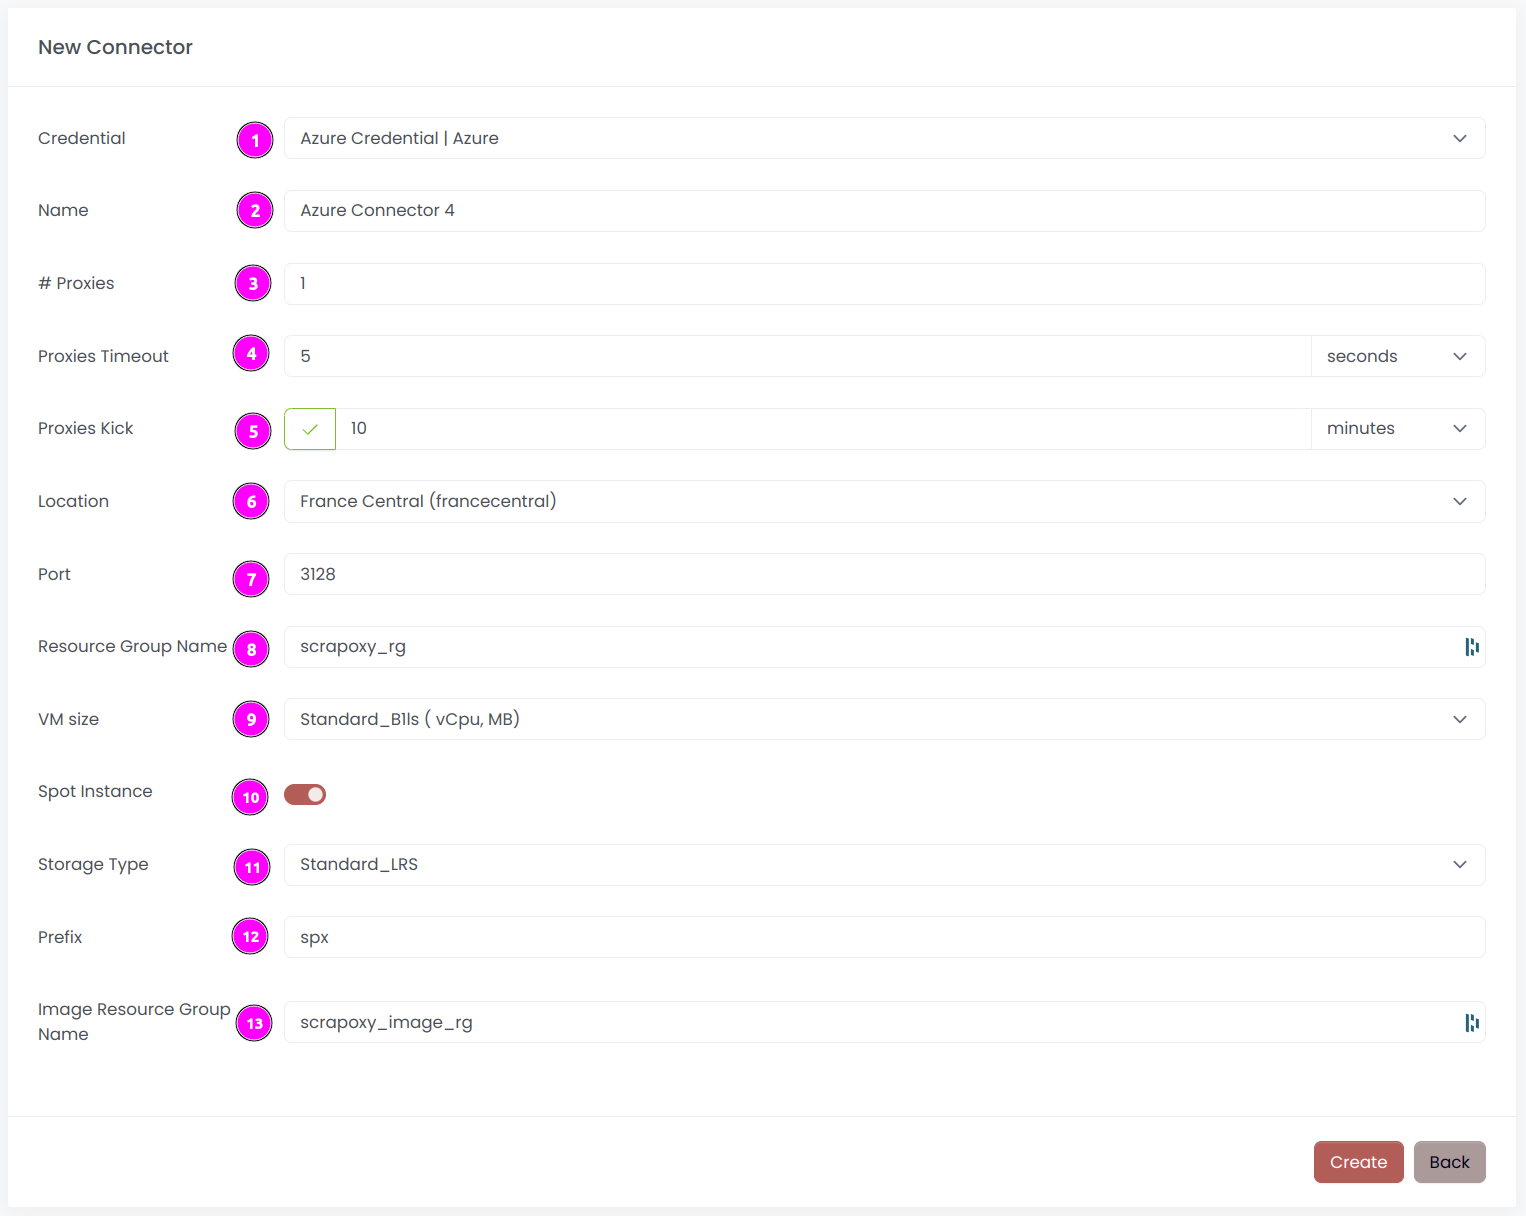
Complete the form with the following information:
- Credential: The previous credential;
- Name: The name of the connector;
- # Proxies: The number of instances to create;
- Proxies Timeout: Maximum duration for connecting to a proxy before considering it as offline;
- Proxies Kick: If enabled, maximum duration for a proxy to be offline before being removed from the pool;
- Location: The region where the instances will be created;
- Port: The port of the proxy (on Azure);
- Resource Group Name: The resource group to host the instances;
- VM size: The size of the VM;
- Spot Instance: If enabled, the VM will be a spot instance;
- Storage Type: The type of storage;
- Prefix: The prefix for all resources created on Azure;
- Image Resource Group Name: The resource group where the image is stored.
And click on Create.
Most default values can be retained if suitable for the use case.
WARNING
When setting up the connector in multiple locations, assign a unique Resource Group Name, Image Resource Group Name and distinct Prefix for each location. Without this, connectors may interfere with each other, shutting down instances from the same provider.
Step 3: Start the connector
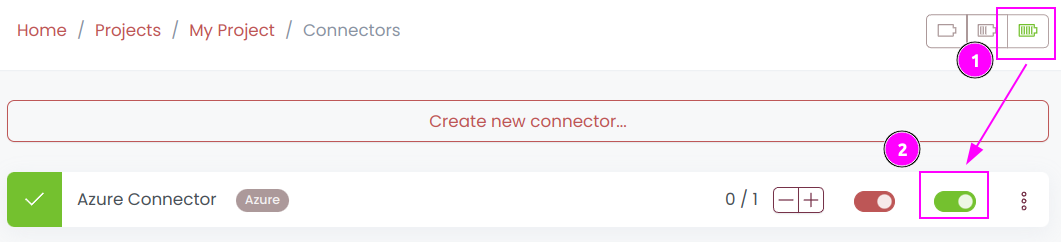
- Start the project;
- Start the connector.
Step 4: Start the connector (optional)

- Stop the connector;
- Wait for proxies to be removed.