Amazon Web Services Connector
Amazon Web Services is a subsidiary of Amazon that provides on-demand cloud computing.
Prerequisites
An active subscription to Amazon Web Services (AWS) is required.
AWS Console
Connect to AWS Console.
There are 2 methods for generating a new credential with AWS:
- With an IAM user, a more secure approach albeit with increased complexity.
- With the Root user, which is easier but not recommended for security reasons.
With an IAM user
This is the recommended method for generating a new credential with AWS.

- On the top right, click on your name to open the menu;
- And click on
Security credentials.

- On the left, click on
User groups; - And click on
Create group.
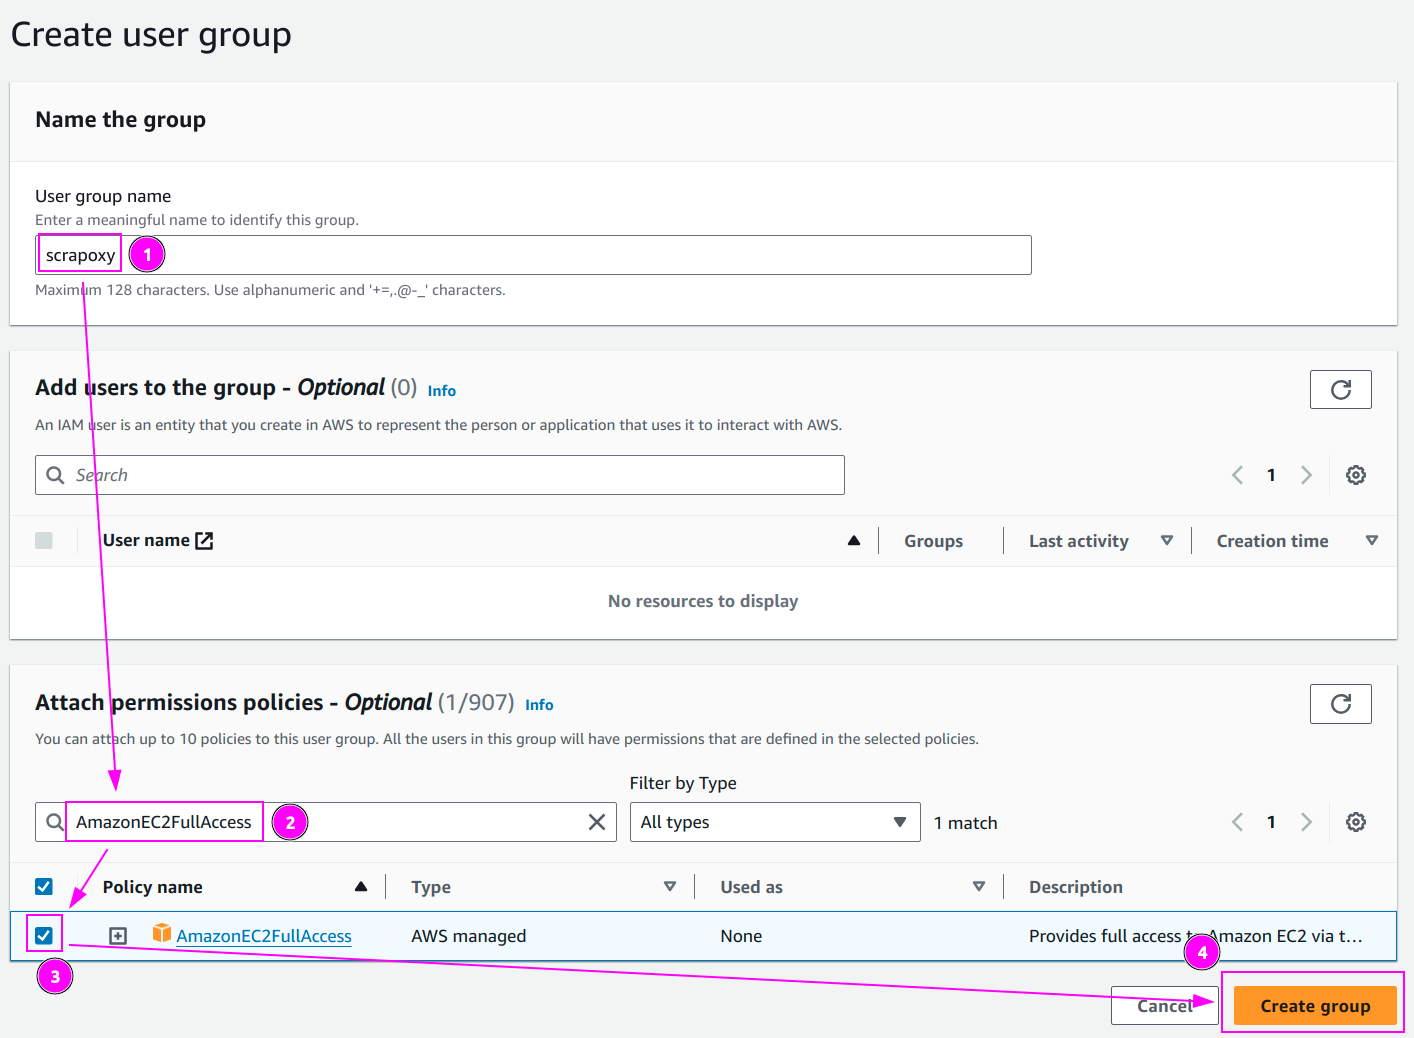
- Enter
scrapoxyas group name; - Search for
AmazonEC2FullAccess; - Select it;
- And click on
Create group.

- On the left, click on
Users; - And click on
Create user.
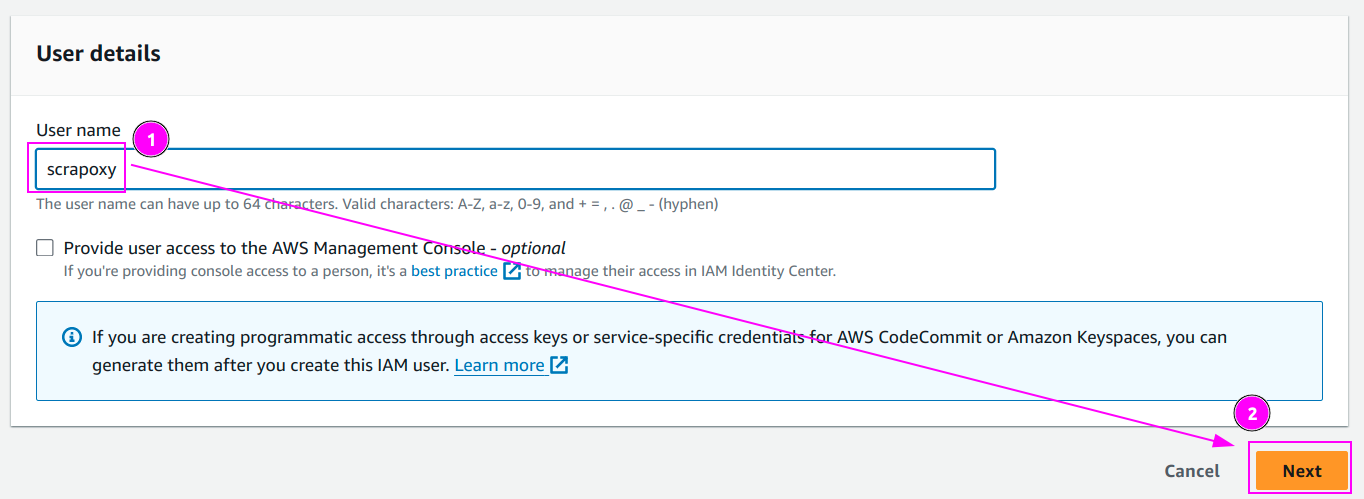
- Enter
scrapoxyas user name; - And click on
Next.
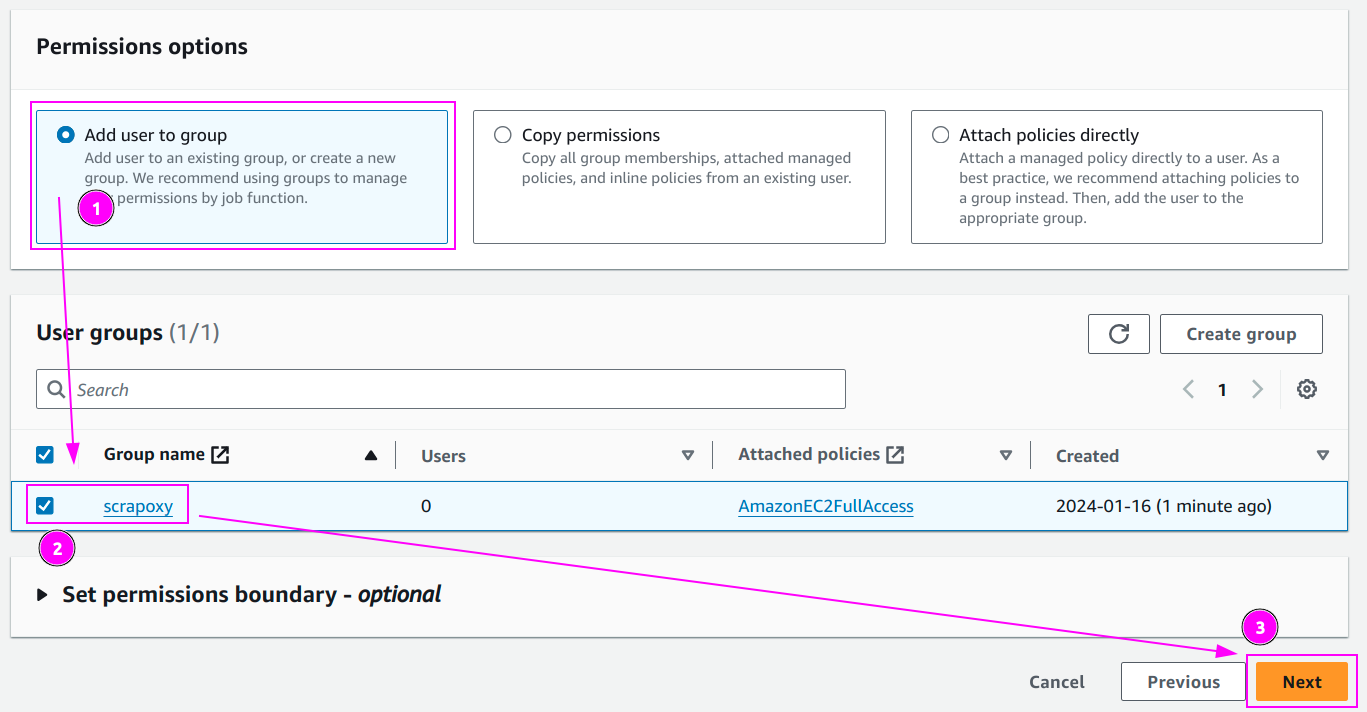
- Select
Add user to group; - Select
scrapoxyas group; - And click on
Next.
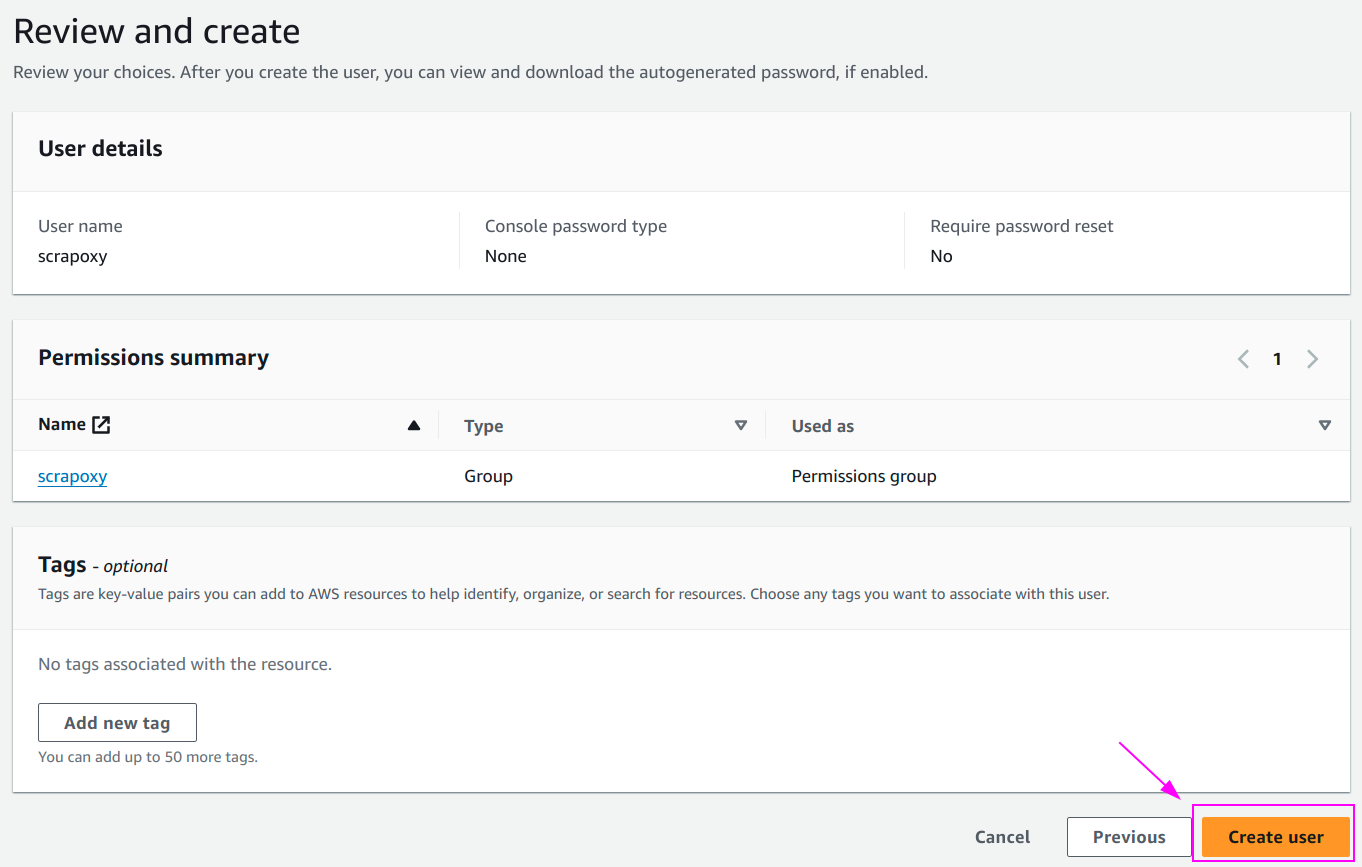
Click on Create user.

Click on the user scrapoxy.
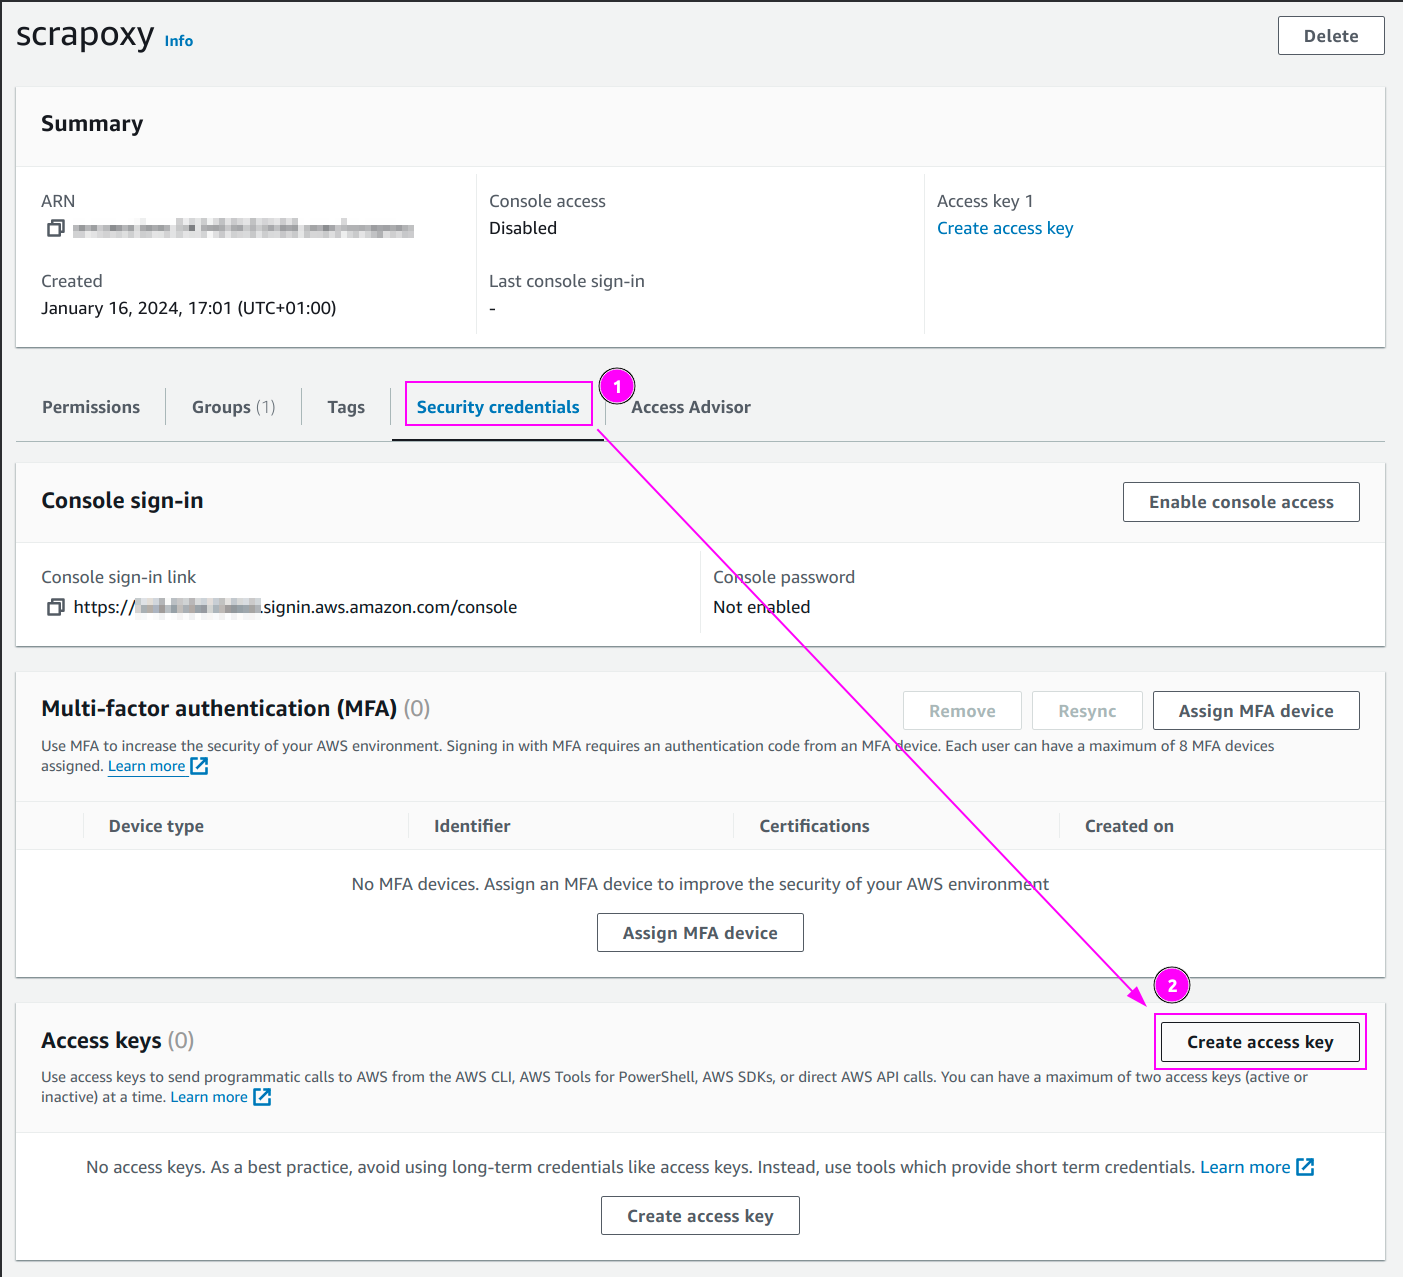
- Select
Security credentialstab; - And click on
Create access key.
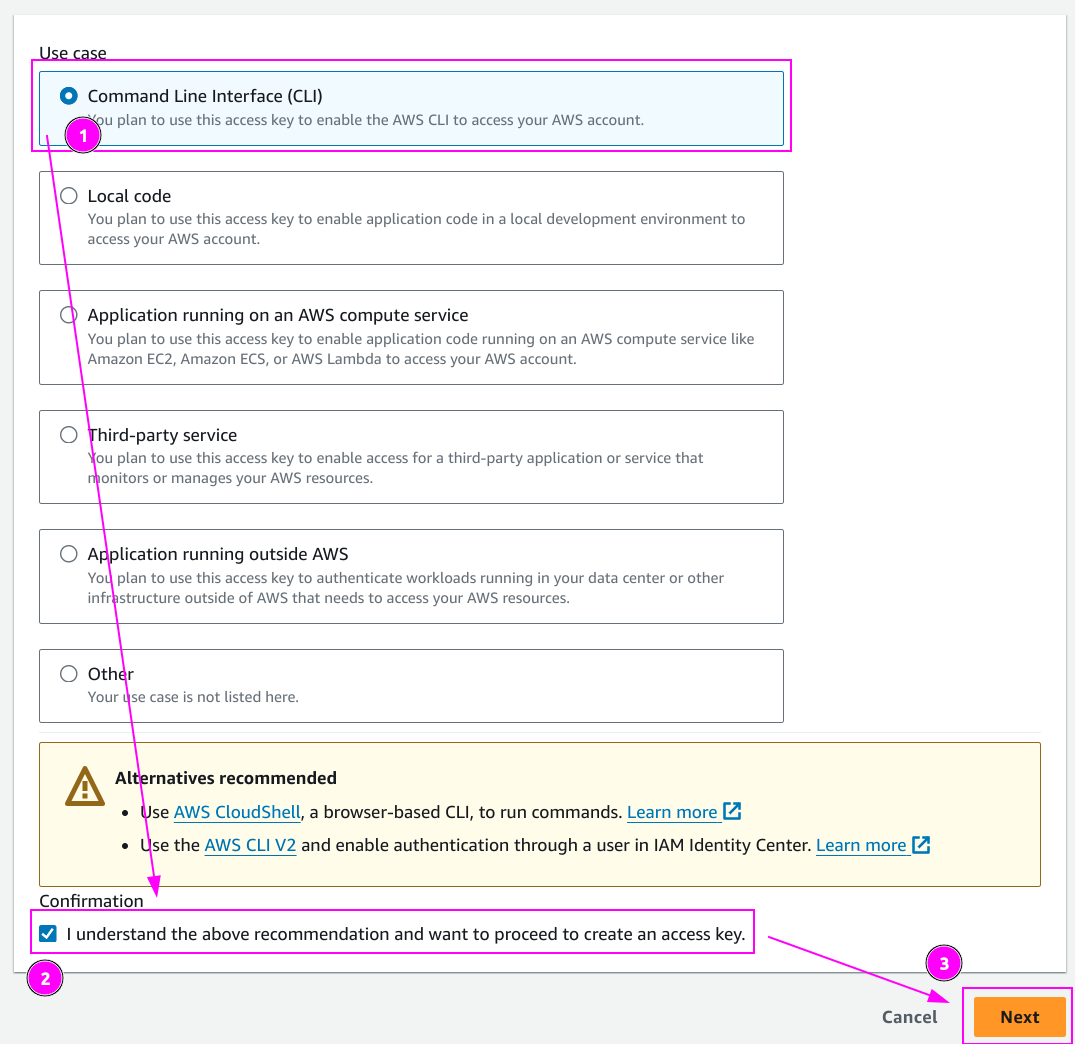
- Select
Command Line Interface (CLI); - Check the confirmation box;
- And click on
Next.

Click on Create access key.
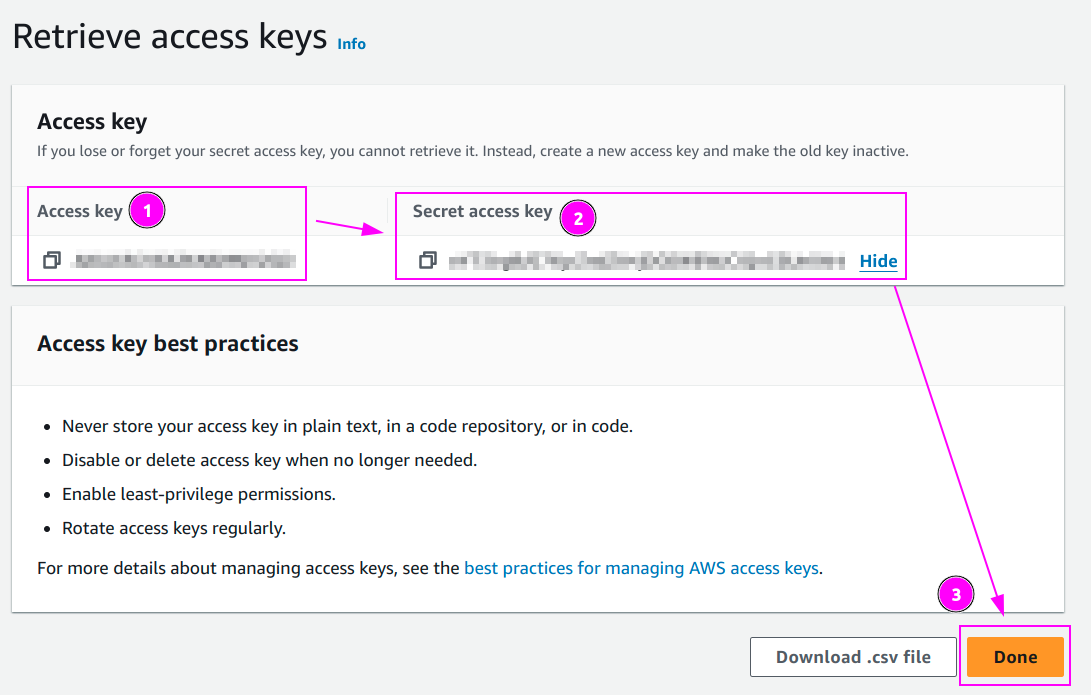
- Remember the
Access key; - Remember the
Secret access key; - And click on
Done.
With the Root user
This method is not recommended for security reasons.

- On the top right, click on your name to open the menu;
- And click on
Security credentials.

Click on Create access key.
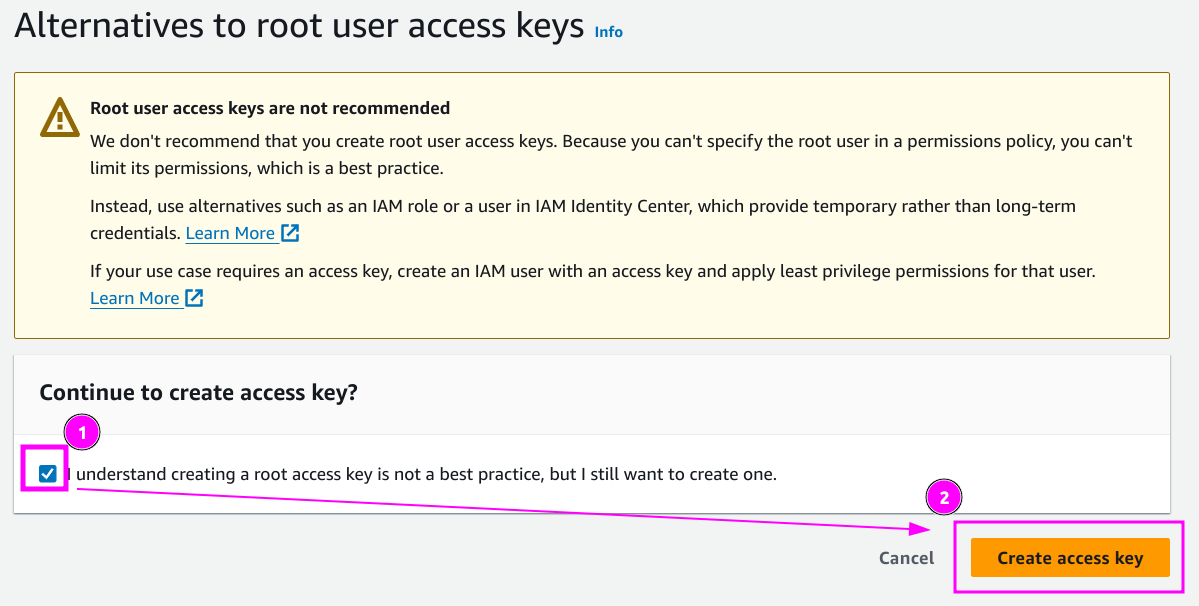
- Check the box;
- And click on
Create access key.
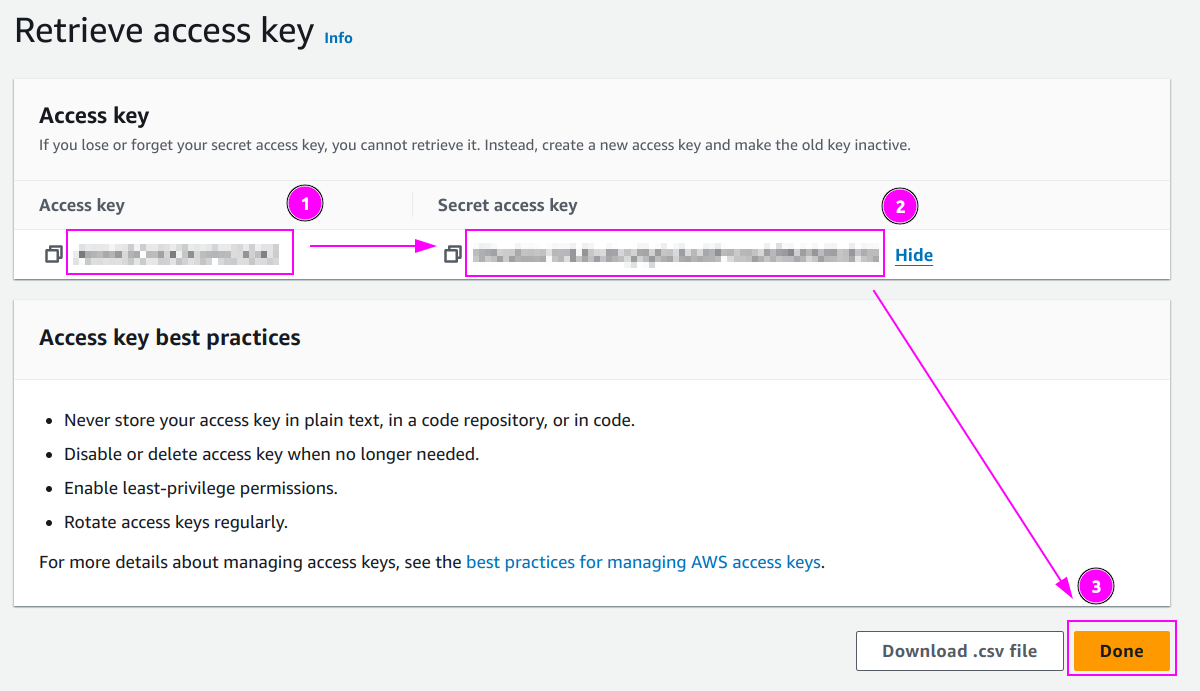
Remember the Access key ID and the Secret access key values.
Scrapoxy
Open Scrapoxy User Interface and select Marketplace:
Step 1: Create a new credential
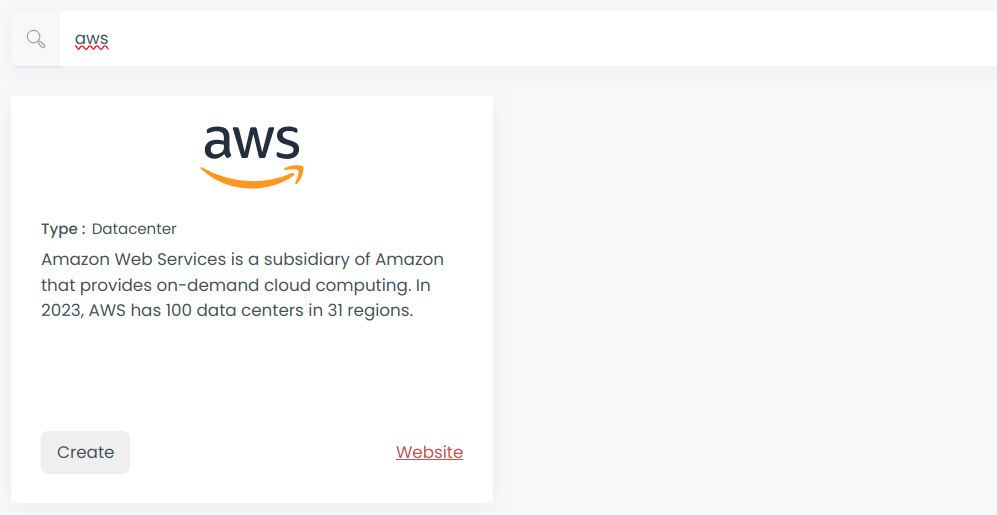
Select AWS to create a new credential (use search if necessary).
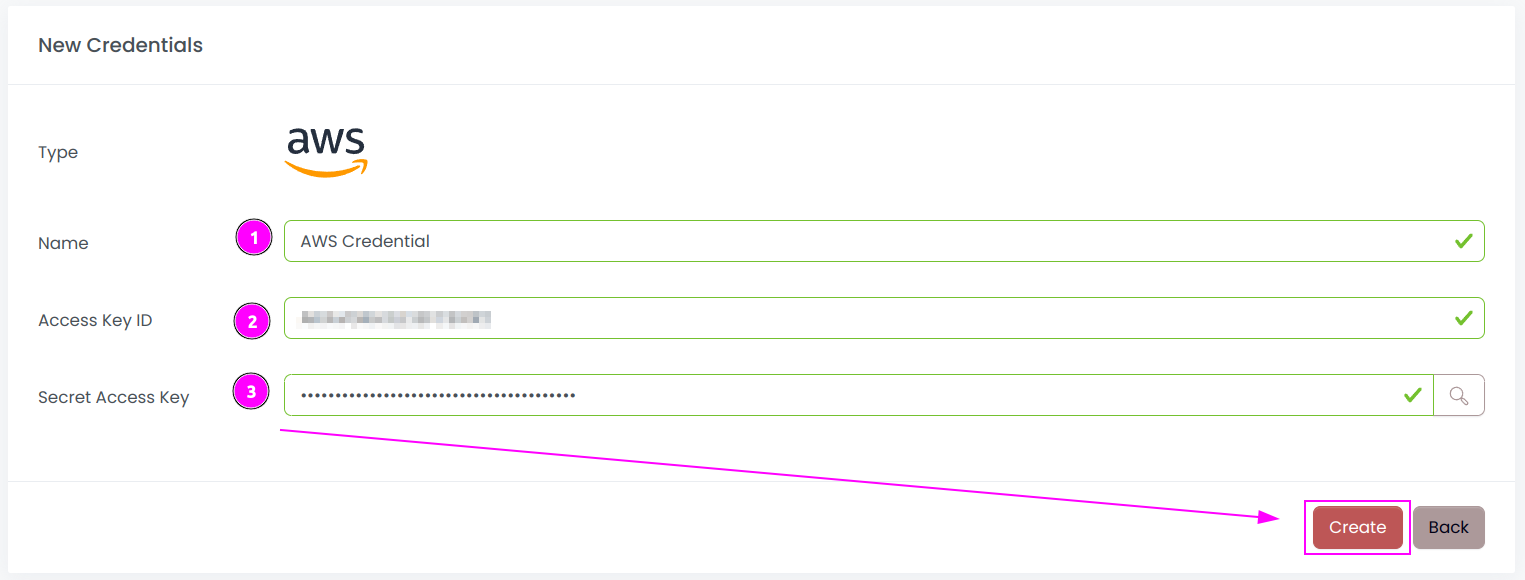
Complete the form by entering the following information:
- Name: Specify the unique name for the credential;
- Access key ID: Provide the Access Key ID associated with the account;
- Secret access key: Enter the Client Secret associated with the account.
And click on Create.
Step 2: Create a new connector
Create a new connector:
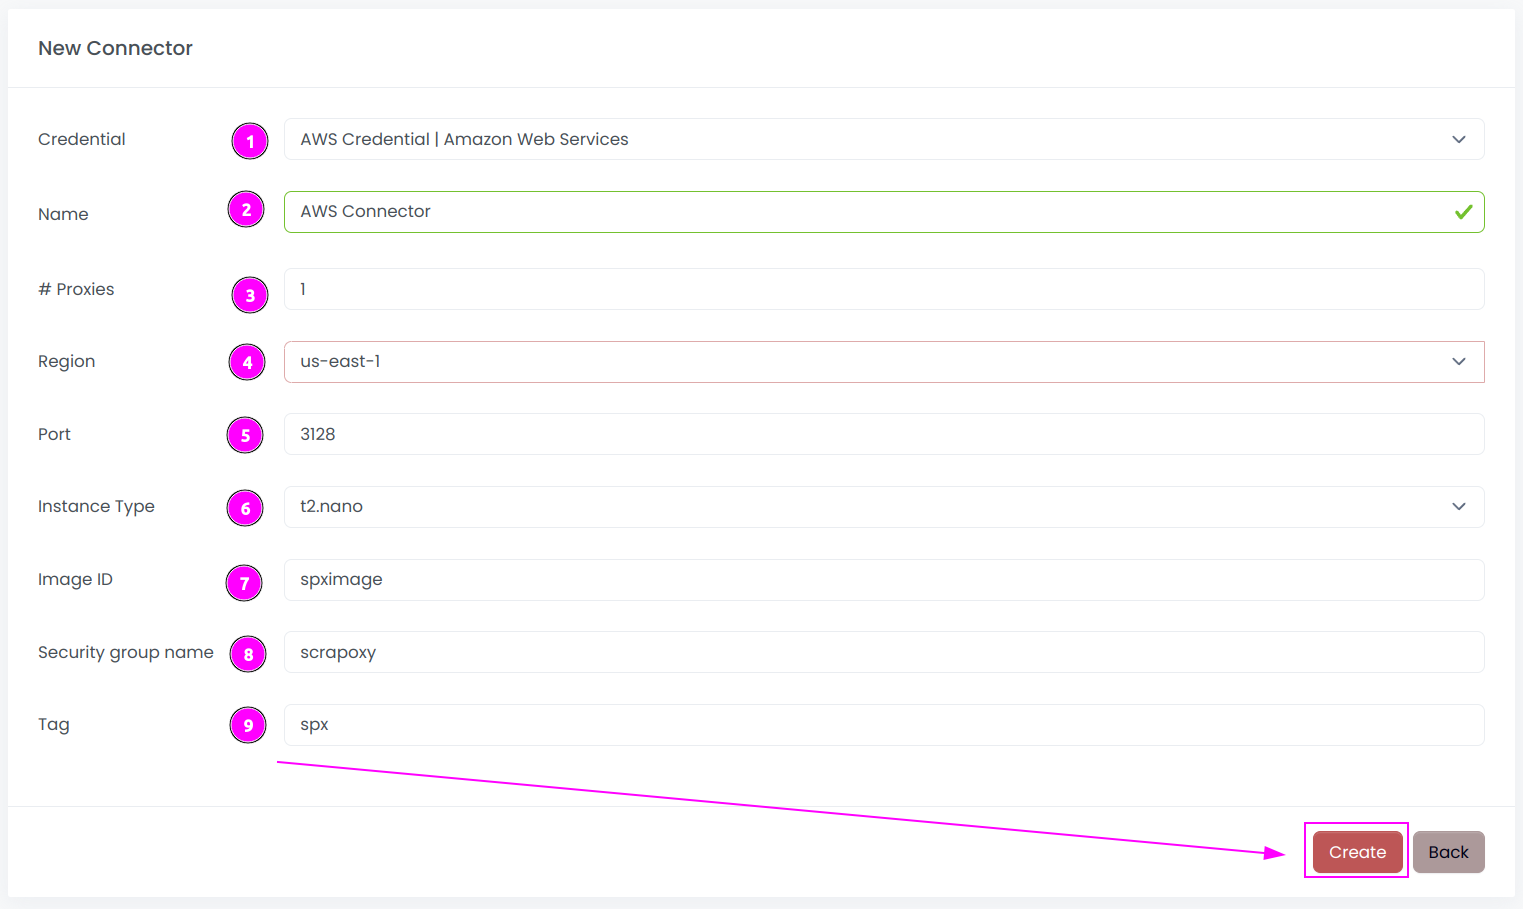
Complete the form with the following information:
- Credential: The previous credential;
- Name: The name of the connector;
- # Proxies: The number of instances to create;
- Region: The region where the instances will be created;
- Port: The port of the proxy (on AWS);
- Instance Type: The type of the instance;
- Image ID: The name of the image in the region;
- Security group name: The name of the security group containing the firewall rules;
- Tag: The default tag for instance.
And click on Create.
Most default values can be retained if suitable for the use case.
WARNING
When setting up the connector in multiple regions, assign a unique Image ID and distinct Tag for each region. Without this, connectors may interfere with each other, shutting down instances from the same provider.
Step 3: Start the connector

- Start the project;
- Start the connector.
Step 4: Stop the connector (optional)

- Stop the connector;
- Wait for proxies to be removed.

 Scrapoxy
